Pages

Showing posts with label Vegetarian. Show all posts

Tuesday, March 22, 2011

Hummus: How do you eat it?

For all those who like hummus... how do you eat it? With fresh vegetables? Pita chips? On a pita sandwich? Or maybe even by itself?! Ha!

Well... let me tell you... I LOVE hummus! And I found a great recipe in Veganomicon that I insist on sharing with you all! This is a classic recipe that is just perfect with fresh veggies! I also used this hummus recipe in my Too Good-To-Be-True, Healthy Nori Rolls! Yum, yum, yum!

Veganomicon's Hummus Recipe:

Ingredients
  • 2 (15-oz) cans chickpeas (I used slightly more than this, one 15-oz can and one 19-oz can)
  • 1/3 cup olive oil
  • 1/4 cup fresh lemon juice
  • 3 tbsp tahini
  • 3 cloves garlic, crushed
  • 1/4 cup water
  • Pinch of coriander
  • Salt, to taste
  • Pepper, to taste
  • Paprika (optional)
Directions
  1. Puree half of the chickpeas and olive oil in a food processor by pulsing serveral times and stirring a few times in between.
  2. Add the remaining chickpeas and olive oil, as well as the lemon juice, tahini, garlic, water, coriander, salt, and pepper.
  3. Pulse several times and stir, until the desired creamy consistency.
  4. Transfer to a bowl and garnish with paprika.
  5. Cover and refrigerate until ready to eat. Serve with fresh vegetables or pita chips or use as a spread on a sandwhich.
To the cooks of Veganomicon, Isa and Terry: Thank you so much for the wonderful recipes!!

Sunday, March 13, 2011

Lentil Marinara Sauce: Super Thick and Yummy!

I am back! Sorry it has taken me so long to update my blog. It gets a little busy when you have family and best friends visiting, and unfortunately, those unexpected events. But here I am, ready to share my fun and fabulous dishes with you all!

I adapted this lentil marinara sauce recipe from Mrs. J. She had given me this recipe months ago and I finally got the chance to check it out! As I was cooking it though, I decided to turn it into something a little bit more than sauce! More like a stew, but it was a nice, thick sauce perfect over pasta, sauteed veggies (my preference for a healthier dish), or even rice! I love marinara sauces, and to me, the thicker, the better! Yum!

Ingredients
  • 1 large onion, chopped
  • 3-4 fresh garlic cloves, minced
  • 1-2 tbsp olive oil
  • 4 cups vegetable broth
  • 1-1/2 cups lentils, uncooked 
  • 1/8-1/4 tsp cayenne
  • 4 large carrots, peeled and roughly chopped
  • 3 (6-oz) cans tomato paste
  • 2 (14.5) oz cans diced tomatoes, undrained
  • 1-2 cups broccoli florets
  • 3/4 salt
  • pepper, to taste
  • 1/2 tsp basil
  • 1/2 tsp oregano
  • 1/2 tsp parsley
  • 1/2 tsp Italian seasoning
  • 3 handfuls of baby spinach leaves

Directions
  1. In a  large pot or dutch oven, saute the onion and garlic in oil on medium-high heat until tender.
  2. Add the broth, lentils, and cayenne pepper. Bring to a boil, reduce the heat and simmer for 40-45 minutes covered.
  3. While the lentil mixture is cooking, steam the carrots for roughly 20 minutes, then puree or mash them. This helps to thicken the sauce. Set aside.
  4. Once the lentils are done cooking, to the lentil mixture, add the pureed/mashed carrots, tomato paste, diced tomatoes,  broccoli florets, and spices. Bring to a boil, then reduce the heat and simmer uncovered for 20-30 minutes.
  5. Add the spinach leaves, cover the pot and simmer for 5 minutes more, until the spinach is wilted.
  6. Serve over sauteed, julienned vegetables (i.e. zucchini, squash, carrots) or rice or pasta. Top with fresh basil.
  7. Enjoy!

Thursday, February 10, 2011

Too-Good-To-Be-True, Healthy Nori Rolls

Liking the idea of a lower-carb nori roll, I came up with this yummy recipe! I don't think you could have a healthier nori roll! It's loaded with nutrient-rich foods, antioxidants, and get this, it tastes fantastic! I uploaded my recipe to VegWeb, so check it out!

Too-Good-To-Be-True, Healthy Nori Rolls

Ingredients
  • 2 nori sheets
  • 1/2 cup prepared hummus, divided (recommended: Veganomicon's "A Hummus Recipe")
  • 2-4 tbsp pine nuts, divided
  • avocado, thinly sliced
  • carrots, julienned
  • cucumber, julienned
  • red bell pepper, thinly sliced
  • 1/2 cup alfalfa sprouts, divided
Directions
  1. Using a bamboo mat, place a nori sheet on top of it, spread approximately 1/4 cup hummus on 2/3 of the nori sheet (closest to you).
  2. On top of the hummus, sprinkle with 1-2 tbsp of pine nuts, then top with avocado, carrots, cucumber, and red bell pepper in a thin row. Top the vegetables with 1/4 cup alfalfa sprouts. Be sure not to pile too many veggies on top, as it will be difficult to roll (my recipe is very close to overload though!).
  3. Take the end of nori sheet closest to you, and begin to roll up and over the vegetables. Use the bamboo mat to tighten that portion of the roll. Continue to roll (with the use of your bamboo mat) until the entire sheet is rolled up. Place the roll on a plate, and begin making the next roll. Place the second nori roll on the plate.
  4. Refrigerate the nori rolls for at least 30 minutes before slicing. 
  5. Once chilled, slice the nori rolls. Wet a knife and cut each roll into 6-8 pieces. Wetting the knife aids in the slicing process. 
  6. Enjoy!
* Note: The amounts of vegetables in this recipe depend on your preference. Be careful not to overstuff the nori roll though! Recommend using 2-4 slices of each vegetable per roll.


Tuesday, February 8, 2011

Super Bowl XLV Hors d'œuvre Night!

What's better than hors d'œuvres for Super Bowl Sunday?! Woohoo! Although the Pittsburgh Steeler's didn't quite make the spotlight, we still had a nice and fun dinner watching the game, especially those commercials!

The Super Bowl XLV Menu:

Tuscan Bean Dip with Assorted Fresh Vegetables
Loaded-Veggie Nori Rolls
My Crazy-Healthy Experimental Nori Rolls
Baked  Spring Rolls
Homemade Nutella Spreads with Assorted Fresh Fruit
Front: Hazelnut Nutella
Back: Almond and Cashew Nutella

#1 Tuscan Bean Dip by Food Network

  Ingredients
  • 2-4 tbsp olive oil
  • 4-6 cloves garlic, minced
  • 1-2 tbsp fresh rosemary leaves
  • 1 (15-oz) can cannellini (northern) beans, drained and rinsed
  • 1/2-1 tsp sea salt
  • Pinch cayenne pepper
  • Fresh vegetables for dipping: carrots, celery, red and green bell pepper, cucumber, broccoli
Directions
  1. Heat oil and garlic in a small skillet over medium-high heat. Stir garlic until golden, about 3 minutes.
  2. Pull skillet from heat; stir in rosemary and cool slightly.
  3. In a food processor, add the beans, salt, cayenne pepper and rosemary oil. Process until smooth.
  4. Scrape the puree into a serving bowl.
  5. Serve dip with fresh raw veggies!
This bean dip is so delicious! A friend brought it over one time and I just loved it! I used to be all over blue cheese when fresh vegetables were near, but I'd never go back after trying this bean dip! I also never cared for rosemary until I tried this dip. Let me tell you, fresh rosemary is very different than dried, and it adds a wonderful flavor to this bean dip! I hope you enjoy it as much as I do! Yum!

 
#2 Loaded-Veggie Nori Rolls

  
#3 My Crazy-Healthy Experimental Nori Rolls

Ingredients
  • 4 nori sheets
  • 1 recipe Veganomicon's Sun-Dried Tomato Dip
  • Sun flower seeds
  • Carrots, julienned
  • Cucumber, julienned
  • Red bell pepper, thinly sliced
  • Avocado, thinly sliced
  • Alfalfa sprouts
Directions
  1. Using a bamboo mat, place a nori sheet on top of it, add approximately 1/4 cup tomato dip on 2/3 of the nori sheet (closest to you). On top of the dip (on the closest part of the nori sheet to you), sprinkle sunflower seeds on top, then top with remaining ingredients. Be sure not to pile too many veggies on top, as it will be difficult to roll!
  2. Take the end of nori closest to you, and begin to roll up and over the vegetables. Use the bamboo mat to tighten that portion of the roll. Continue to roll (with the use of your bamboo mat) until the entire sheet is rolled up. Place on a plate, allowing the nori roll to soften, while you continue making the next rolls.
  3. When all 4 nori rolls are made, starting with the first one made, wet a knife and cut each roll into 6-8 pieces. Wetting the knife aids in the slicing process. 
I won't be posting Veganomicon's Sun-Dried Tomato Dip recipe unless it is requested. Unfortunately, I didn't really care much for it. I would like to try this same nori roll with hummus next time, maybe some pine nuts, and fresh basil! I will post this if I do! 

 
#4 Baked spring rolls (Click to view original recipe)

Ingredients
  • 2 cups grated carrots
  • 1 (14.5 ounce) can chop suey vegetables, drained
  • 1 (8-oz) can water chestnuts, chopped
  • 1/2 green pepper, chopped
  • 1 bunch green onions, chopped
  • 1 garlic clove, minced
  • 1 (15-oz) can black beans, drained and rinsed
  • 4 teaspoons cornstarch
  • 1 tablespoon water
  • 1 tablespoon light soy sauce
  • 1 teaspoon vegetable oil
  • 1 teaspoon brown sugar
  • Pinch cayenne pepper
  • 16 rice paper wrappers (can purchase at an Asian market)
Directions
  1. Heat a large skillet with olive oil and add the first six ingredients. Cook and stir over medium heat until vegetable are crisp-tender, about 3 minutes. Add the beans; heat through.
  2. In a small bowl, combine the cornstarch, water, soy sauce, oil, brown sugar and cayenne until smooth; stir into the vegetable mixture and bring to a boil. Cook and stir for 2 minutes; remove from the heat.
  3. Fill a large bowl with warm water. One at a time, dip the rice paper in the water for 20-30 seconds until it becomes soft and flexible. Lay on a flat surface. Spoon 1/4 cup of the vegetable mixture on the bottom third of the rice papper; fold sides toward center and roll tightly. Place seam side down on a baking sheet coated with nonstick cooking spray. Repeat with remaining rice paper wrappers and filling. Spray the tops of the spring rolls with nonstick cooking spray. Bake at 425 degrees F for 20-25 minutes or until lightly browned.
These spring rolls were DELICIOUS! I highly recommend them! The only issue I had was with the rice paper wrappers...  I had made all of the rolls early in the day, so I refrigerated them in a tupperware container. As they sat in the fridge, each roll clung to one another, so when I went to take them out of the container they were stuck together! The rice paper is very delicate once it gets soft, so it tore easily when I tried to separate them all. Due to this issue, we had to eat these rolls with a fork, but this didn't take away from the delicious flavor at all! I will definitely be making these again!


#5 Wings from Frankie's Wings & Things

Of course when you have appetizers, and you're around David, you can't forget the wings! These are great but unfortunately I didn't get to have any this time around due to my recent vegan choices. They smelled delicious though, as always! My saliva glands were going crazy when I was serving them LOL! 

 
#6 Homemade Nutella Spreads (Click to view original recipe)

Hazelnut Nutella:

Ingredients
  • 1/2 cup hazelnuts
  • 1/4 cup powdered sugar
  • 1 tbsp cocoa powder
  • 1-2 tbsp vegetable oil
  • water (optional)
  • Assorted fresh fruit for dipping: sliced banana, sliced granny smith apples, sliced braeburn apples, strawberries, green grapes 
Almond and Cashew Nutella:

Ingredients
  • 1/2 cup almonds, blanched
  • 1/2 cup cashews
  • 1/2 cup (scant) powdered sugar
  • 2 tbsp cocoa powder
  • 2 tbsp vegetable oil
  • Assorted fresh fruit for dipping: sliced banana, sliced granny smith apples, sliced braeburn apples, strawberries, green grapes 
Directions
  1. Place the nuts in a food processor and process until the nuts start to clump together in a ball, at least 5 minutes, if not more.
  2. Add the powdered sugar and cocoa powder and process again for 2 to 3 minutes, until the mixture is well combined.
  3. Drizzle in enough oil to make a spread. If the consistancy is not right after the addition of oil, add a bit of water (I had to do this for the hazelnut spread).
  4. Store in an airtight container in the refrigerator for 4 to 6 weeks. Serve with fresh fruit, graham crackers, or spread on bread!
The homemade nutella spread was posted from One Perfect Bite, who seems to always be posting fun and exciting recipes!

Hope you like the menu! Some of the hors d'œuvres were a little time-consuming, but all worth it! Enjoy!


Monday, February 7, 2011

Eggplant and Chickpea Curry

In the mood to try something new, I came across Healthy Girl's Vegan Indian Eggplant Curry. It looked good and I had all of the spices that needed to go into it (minus the fenugreek, which is more of an optional flavor), so I gave it a shot and it was delish! I added a little protein into the dish (chickpeas!) so it could be a more nutitionally-balanced entree! I served this with sticky brown rice for David and he enjoyed it! I plan to make this again this week! Yum!

Eggplant and Chickpea Curry

Ingredients
  • 1 Tbsp coconut oil
  • 1 large onion, peeled and diced
  • 4-6 garlic cloves, minced
  • 1 (1-inch) piece of fresh ginger, peeled and grated on a microplane
  • 1 jalapeno pepper, seeded and minced
  • 2 medium tomatoes, seeded and chopped
  • 1/2 cup vegetable broth
  • 1 large eggplant, peeled and cubed
  • 1 red bell pepper, seeded and diced
  • 1 yellow bell pepper, seeded and diced
  • 1 (15-oz) can chickpeas, drained and rinsed
  • 1 tsp sea salt
  • 1 tsp turmeric
  • 1 tsp ground coriander
  • 1/2 tsp ground cumin
Directions
  1. Heat oil in a large saucepan. Add the onions, garlic, ginger and jalapeno and cook for 10 minutes.
  2. Add the tomatoes to the pan and cook for 5 minutes.
  3. Add the broth, eggplant, peppers, chickpeas, salt, turmeric, coriander and cumin and cook over medium heat, stirring occasionally, for 70 minutes.
  4. Serve immediately or reheat before serving.
  5. Optional: Serve over brown rice.


Wednesday, February 2, 2011

Rachel's Loaded-Veggie Sushi Rolls

Saturday night we decided would be sushi night! But I really had an urge to try making sushi myself! I got a few pointers from VegWeb's Healthy Avocado Sushi with Brown Rice on how to make the sushi rice. Healthy Vegan Recipes has a great video which shows you how to roll sushi and I recommend watching it if you're a beginner! Here's what I came up with!

Rachel's Loaded-Veggie Sushi

Ingredients
  • 1 cup short-grain brown rice
  • 2 cups water
  • 2 tbsp apple cider vinegar or rice vinegar
  • 5 nori (seaweed) sheets
  • Assorted vegetables*: Avocado, thinly sliced; Scallions; Red bell pepper, thinly sliced; Bean Sprouts; Zucchini, julienned; Carrot, julienned
  • Low-sodium soy sauce (optional)
  • Pickled ginger (optional)
  • Wasabi (optional)
Directions
  1. In a small pot, bring the rice and water to a boil. Once boiling, stir rice once, cover pot and reduce heat to a simmer for 50 minutes.
  2. When rice is finished cooking, transfer to a bowl. Gently stir in the vinegar until it is well-mixed into the rice (rice will stick together). Place a piece of plastic wrap over the bowl and allow rice to sit for 10 minutes, letting it cool, before making the sushi rolls.
  3. Here is where the video will really help you: Using a bamboo mat, place a nori sheet on top of it, add 1/5 of the rice on 2/3 (closest to you) of the sheet. On top of the rice (on only the closest part of the nori sheet to you), stack the vegetables in a thin row on top of each other. Take end of nori closest to you, and begin to roll up and over the vegetables. Use the bamboo mat to tighten that portion of the roll. Continue to roll (with the use of your bamboo mat) until the entire sheet is rolled up. Place on a plate, allowing the rice to soften the nori, while you continue making the next sushi rolls.
  4. When all 5 sushi rolls are made, starting with the first sushi roll made, wet a knife and cut each roll into 6-8 pieces. Wetting the knife aids in the slicing process or else the rice will stick to the knife, making it difficult to cut.
  5. Serve with soy sauce, ginger and wasabi. Yum!
*Note: I did not put amounts for the vegetables I used because it is really all your own preference! You really don't need a lot of veggies to make one roll, let alone the 5 rolls I made, so I highly recommend these few friendly tips before preparing your own sushi and deciding on amounts:
  1. Warning: DO NOT ATTEMPT TO STUFF YOUR SUSHI ROLL. Stuffing your sushi roll makes it very difficut to roll up and slice. Yes, I am speaking from experience but was not about to take a picture of the disaster!
  2. Wrap sushi roll as tight as possible with bamboo mat. The tighter your roll, the easier it is to slice.
  3. Wet knife before slicing sushi roll into pieces (the rice sticks to the knife, making it difficult to cut).
  4. Don't forget to have fun!
Enjoy!

Tuesday, February 1, 2011

The Herbivore's Out-of-this-World 5-Bean Chili

Okay, so Recipe #4 of The 2011 Cookbook Challenge required a little something extra. We need some chili to go with our cornbread! So I came up with a new chili recipe. I just love experimenting! I decide to post this on VegWeb.com and soon after they gave a special announcement on Facebook about my recipe! How exciting! You can really find some really good vegetarian/vegan recipes on their website. Hope you enjoy my latest creation!


Ingredients
  • 2 tbsp olive oil
  • 1-1/2 yellow onions, chopped
  • 4-5 garlic cloves, minced
  • 1 celery stalk, diced
  • 5 (small- to medium-sized) carrots, peeled and diced
  • 2 (14.5-oz) cans diced tomatoes, undrained
  • 1 (15-oz) can organic garbanzo beans, drained and rinsed
  • 1 (15-oz) can organic soy beans, drained and rinsed
  • 1 (15.5-oz) can dark red kidney beans, undrained
  • 1 (15.5-oz) can light red kidney beans, undrained
  • 1 (15.5-oz) can black beans, undrained
  • 1 red bell pepper, seeded and diced
  • 1 jalepeno chili pepper, seeded and finely diced
  • 1/2 tsp hot sauce
  • 2 tbsp chili powder
  • 1-1/2 tsp ground cumin
  • 1/2 tsp cumin seeds
  • 1 tsp garlic salt
  • 1/2 tsp dried oregano
  • Fresh cilantro (optional)
Directions
  1. In a dutch oven pot, heat the olive oil over medium-high heat and saute the onions, minced garlic, celery, and carrots until tender (about 5-7 min).
  2. Stir in the diced tomatoes, beans, red bell pepper, jalepeno and hot sauce.
  3. Add the chili powder, ground cumin, cumin seeds, garlic salt, and oregano. Stir to combine.
  4. Bring the chili to a boil, then reduce heat and simmer for at least 30 minutes.
  5. Optional serving suggestion: Ladle into bowls and garnish with fresh cilantro. Stir into chili for a delicious flavor.
  6. Serves 4-6.
The cilantro mixed into the chili brought out an amazing flavor. Cilantro is an acquired taste. It has a very distinct flavor and most people either love it or hate it. If you bring up the word cilantro to my sister she freaks out and will go on and on about how much she despises it. I will admit, I did not like it at first, but after quite a bit of experimenting with different foods and flavors, I have realized I do in fact like this little herb! And again, it is AMAZING when stirred into this chili! Enjoy!

Thursday, January 27, 2011

Raw Chocolate Chip Cookies

I came across this raw cookie recipes with... get this... HOMEMADE CHOCOLATE CHIPS! Now this I seriously had to try!

Interestingly, this recipe comes from Oh She Glows, which couldn't be a more perect website for me. I felt I could really relate to this individual and her story so much. If you get a chance, you should read about Angela Liddon and how her passion for cooking came along.

Raw Chocolate Chip Cookies (Click for Oh She Glow's Original Recipe) 

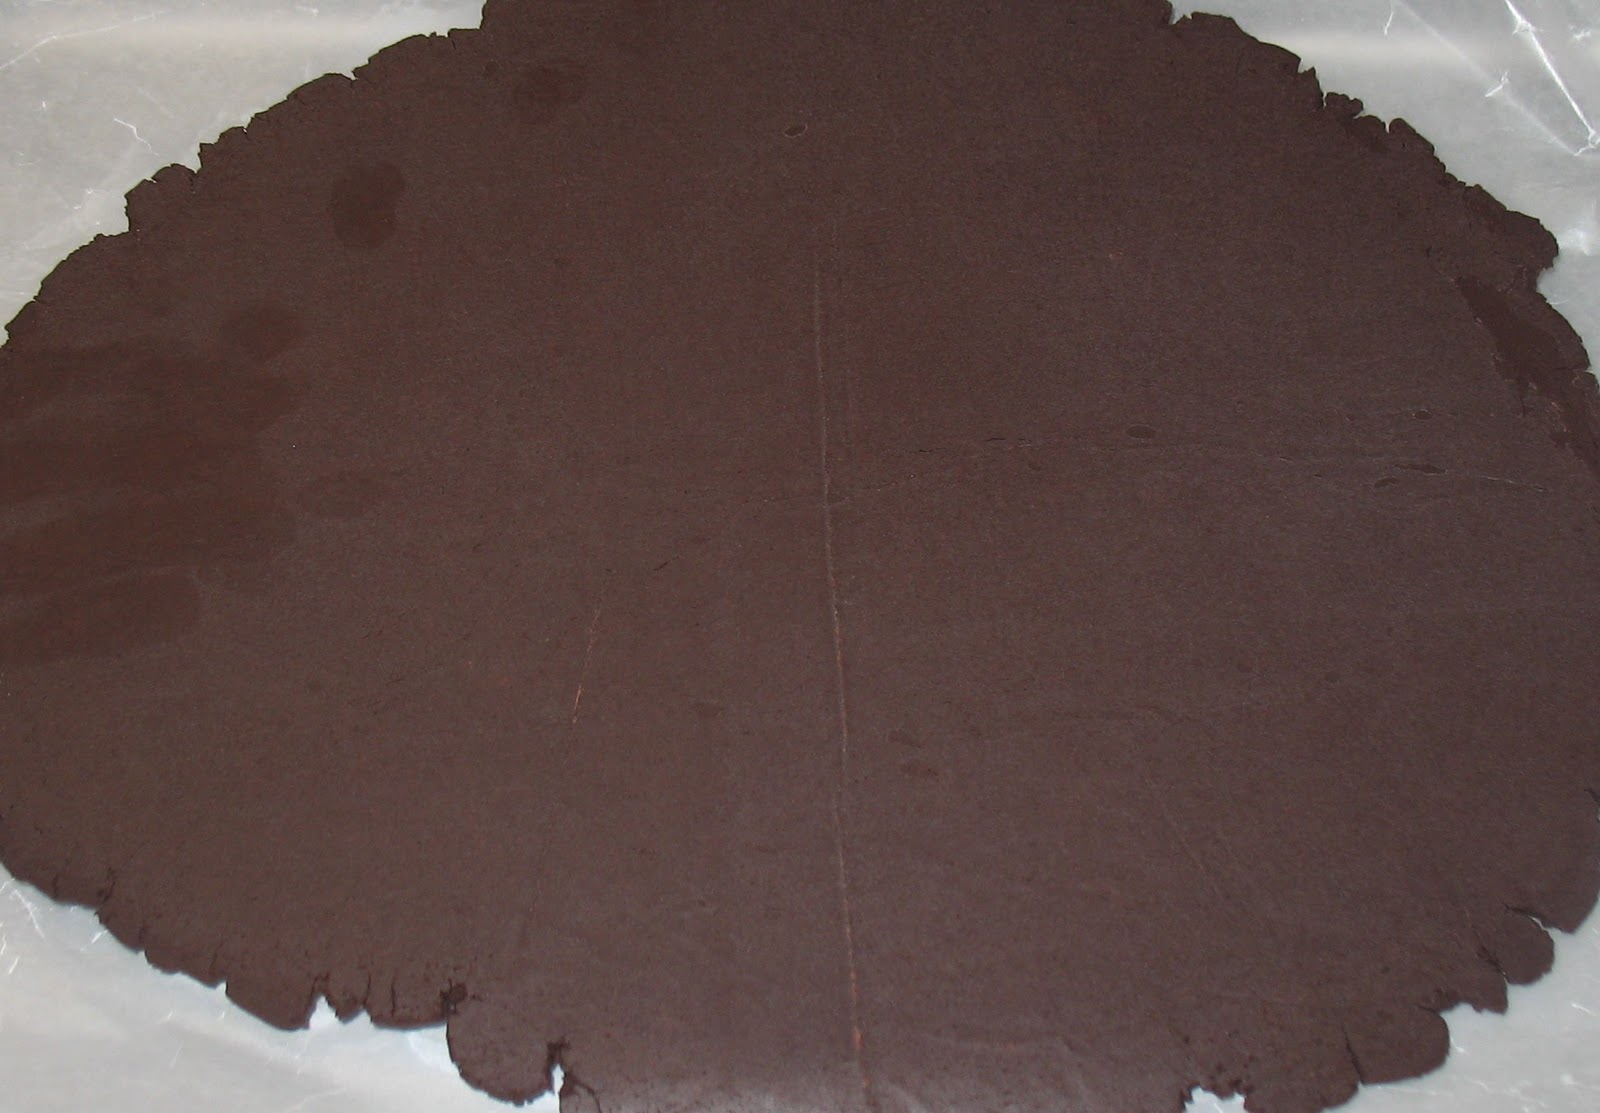
Rolled out homemade chocolate
Ingredients 

For the cookie dough:
  • 1 (8-oz) pkg raw cashews
  • 1/3 - 1/2 cup almond pulp
  • 3/4 cup ground oats (rolled oats ground to a flour consistancy) 
  • 1/4 cup light agave nectar
  • 2 teaspoon vanilla extract
  • 1/4 cup coconut oil   
    Chocolate "chips"
    
For the chocolate chips:
  • 2 Tablespoon coconut oil
  • 1 cup cocoa powder (substitute 1/2 cup carob powder for sweeter, less bitter flavor)
  • 1/4 cup light agave nectar
  • 2 teaspoon vanilla  
Directions 
  1. To prepare the cookie dough: In a food processor, finely ground the cashews. Add the pulp, oats, agave nectar, vanilla, and coconut oil and gently pulse until a dough forms. Form the dough into a large balla nd chill in the refrigerator until ready to use.
  2. To prepare the chocolate chips: Mix all of the ingredients together in a medium bowl until a ball forms. Roll out onto parchment or wax paper (to avoid sticking) and place in the freezer for about 30 minutes. When chocolate is frozen, break into small pieces or "chips". 
  3. 
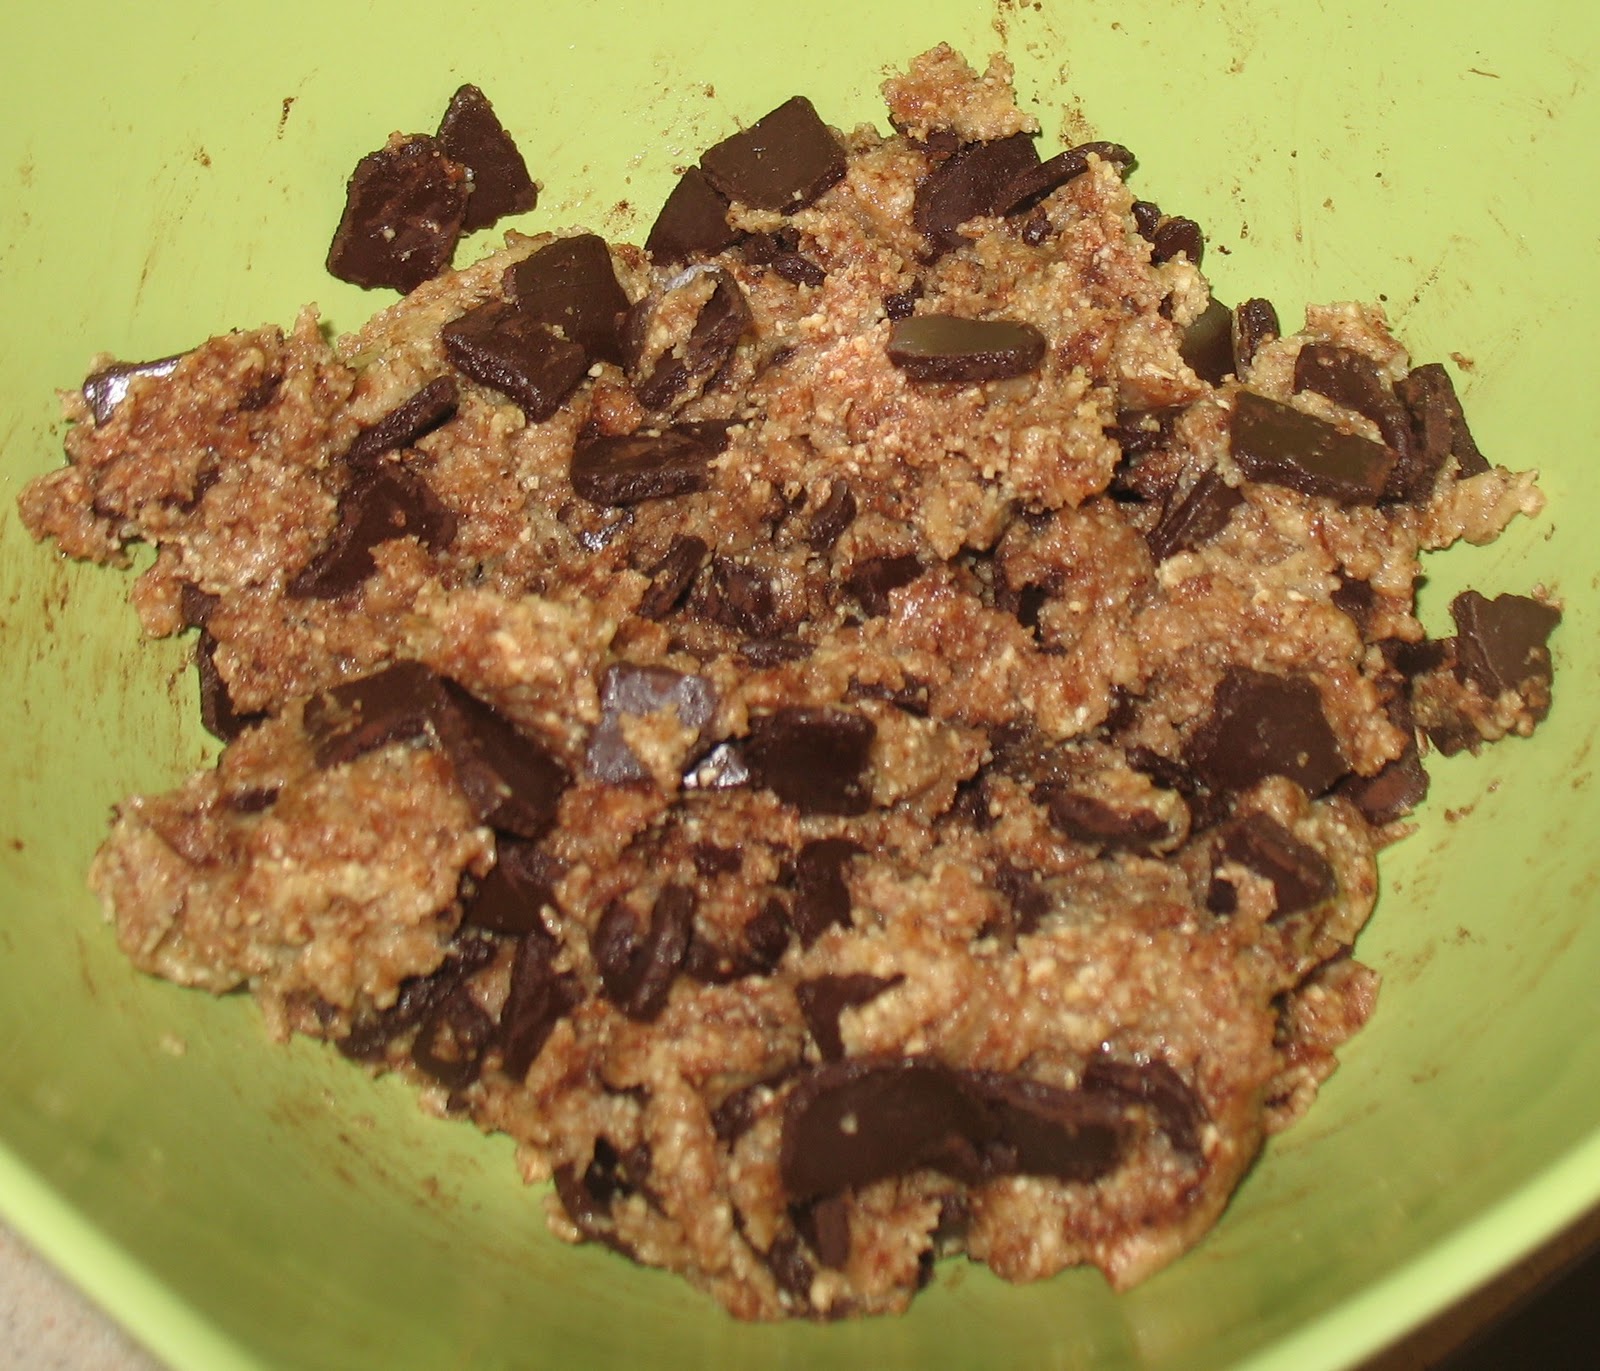
    Mmmm.... cookie dough!! No need to worrry about
    Salmonella with no eggs present! Woohoo!
    To make the raw cookie: Mix the chocolate pieces into the dough. Roll into 1-2 inch balls. Place in a container with parchment or wax paper and refrigerator for at least 30 minutes to harden. 
  4. Other options for this cookie.
    • After rolling into balls, roll in coconut or dip in melted chocolate.
    • Instead of rolling into balls, use a rolling pin to roll out the dough and use cookie cutters.
    • Use other mix-ins: raisins, chopped dates, etc.

Monday, January 24, 2011

Grilled Jamaican Jerk Tempeh with Veganomicon's Mango and Black Bean Quinoa Salad

We had a delicious dinner Sunday night, with the wonderful company of David's mom (eh-hem, a.k.a. Bella's grandma)! David and I decided we wanted to grill... but what to grill? Well, we love Jamaican jerk chicken, but since I haven't been in the mood for meat, I decided to try out this marinade with tempeh. Oh my goodness, it was DELICIOUS! I have to give a big thank you to a recipe contributor of Allrecipes who created this fabulous marinade! I wouldn't change a thing about it. It is so flavorful! 

This time I steamed the tempeh for 10-15 minutes before putting it into the marinade. The tempeh did not have the slight bitterness that I tasted from my first experience with tempeh when I boiled it. I'm not saying that boiling doesn't work, but that steaming the tempeh seemed to work out better for me. I marinated the tempeh in the Jamaican jerk marinade for 24 hours. The tempeh really soaked up all of the flavors so nicely! I had leftover Jamaican jerk tempeh tonight that I was craving all day!

Jamaican Jerk Tempeh

Ingredients

For the marinade (click for original recipe):
  • 1 bunch (6-8) green onions, chopped
  • 1 onion, chopped
  • 1 jalapeno pepper, seeded and minced
  • 3/4 cup low sodium soy sauce
  • 1/2 cup distilled white vinegar
  • 1/4 cup vegetable oil
  • 2 tablespoons organic brown sugar
  • 1 tablespoon fresh thyme leaves
  • 1/2 teaspoon ground cloves
  • 1/2 teaspoon ground nutmeg
  • 1/2 teaspoon ground allspice
For the tempeh:
  • 1 (8-oz) pkg tempeh, quartered diagonally, steamed for 10-15 min and cooled
Directions
  1. Combine all of the ingredients for the marinade in a food processor. Process for 15-30 seconds.
  2. Place the tempeh in a ziplock bag, plastic container, or 8"x8" glass dish.
  3. Pour approximately 1/3 of the marinade into the bag, container or dish (whichever you prefer). The remaining marinade can be saved for another use - it freezes well!
  4. Marinate the tempeh, in the refrigerator, for at least 1 hr or up to 24 hrs. The longer the tempeh marinates, the more flavorful it will be!

I love the colors in this salad! Deliciously beautiful!

Since we planned on making such a great main dish, I wanted to find a fun side dish recipe. I took a look in Veganomicon and saw their recipe for quinoa salad. Yum! And geez-oh-man, was it ever so good!

Veganomicon's Quinoa Salad with Black Beans and Mango (with a few minor changes!)

Ingredients
  • 1 cup red quinoa, uncooked
  • 2 cups water
  • 1 mango, peeled and diced
  • 1 red bell pepper, diced
  • 1 bunch scallions, choppped
  • 1 cup fresh cilantro, chopped
  • 2 tbsp red wine vinegar
  • 2 tbsp grapeseed oil
  • 1/4 tsp salt 
  • 1 (15-oz) can black beans, drained and rinsed
Directions
  1. In a small pot, bring the quinoa and water to a boil and simmer covered for 15 minutes.
  2. In a medium bowl, combine the mango, red bell pepper, scallions, and cilantro.
  3. Stir in the red wine vinegar, grapeseed oil, and salt.
  4. Add the quinoa and stir until well-combined.
  5. Fold in the black beans.
  6. Keep refrigerated until ready to serve. Best when served at room temperature for more flavor.
  7. Serves 4-6. 
By the way, David and his mom both enjoyed the amazing Jamaican jerk chicken with delicious sides of Veganomcon's quinoa salad, my mom's famous roasted potatoes (which I need to blog about sometime), and grilled veggies with our favorite Bone Suckin' Seasoning! Yummy!!

Friday, January 21, 2011

The Ugly Little Vegan Pizza

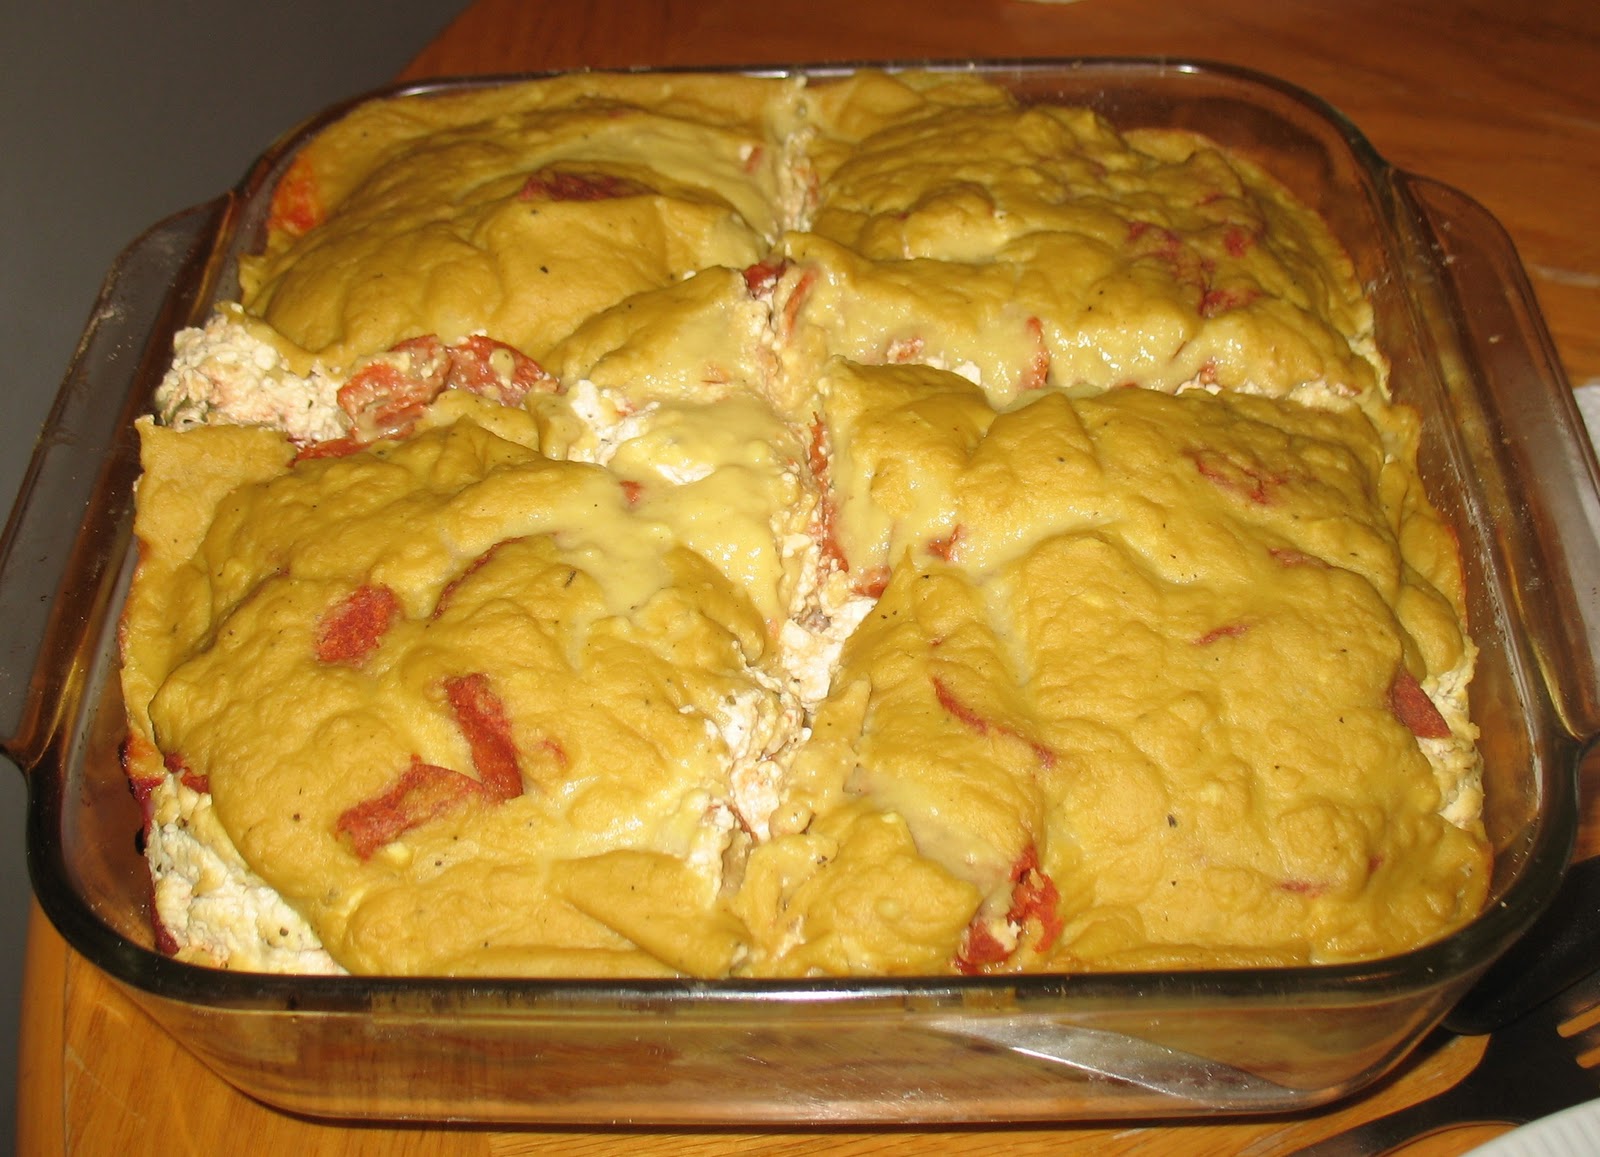
Every Sunday we have dinner with David's mom and I like to change up our meals once in a while. Well, this past sunday was homemade pizza! Of course, since I've been all about veganism these past few weeks, I decided to come up with a special pizza for myself. It didn't turn out too pretty, but I had to share it with you because it was DELCIOUS! I had this three nights in a row and by the third night, I was still craving more!

Here's how my ugly little vegan pizza was made:
  1. Herb Crust Pan Pizza: Thanks to VegWeb!
  2. Sauce: a combination of tomato sauce, tomato paste, and italian seasoning
  3. Sun-dried tomatoes, soaked in water for 15-20 minutes
  4. Thinly-sliced green bell pepper and red onion, sauteed in olive oil, salt, pepper, and garlic powder
  5. Tofu Ricotta: Thanks to Veganomicon!
  6. Tofu pepperoni: Sold in local grocery stores!
  7. Cheezy Sauce: Again, thanks to Veganomicon!
I placed the pizza dough into an 8x8 Pyrex dish, then layered it with the rest of the ingredients. I happened to have leftover cheezy sauce from the first time I made it, which I had froze. So I decided to use it on my pizza; I thawed it out, reheated it, then poured it over the top of the pizza. I baked the pizza at 425 degrees F for 15-20 minutes. Delicious, yet ugly!

Sunday, January 16, 2011

Veganomicon: Smoky Grilled Tempeh

On the weekends, David LOVES to grill! Since I've been in this "I don't feel like eating meat" mood, I decided to start browsing through Veganomicon to figure out what kind of interesting food David could grill for me. Ah-ha! Tempeh! Shannon introduced this food to me when she came to visit for new year's.

For those of you who don't know what tempeh is, it is similar to tofu, but made of whole soybeans and has a much firmer texture. Most vegans would describe tempeh as "meaty" and "nutty."

Check out these websites to get a better idea about tempeh:
Cooking with Tempeh -Vegan Coach
"Tempeh" -Wikipedia
What is Tempeh? -Soya

I found a great recipe: Smoky Grilled Tempeh. Thank you Isa and Terry (the fabulous authors of Veganomicon)!!

I wrote the recipe the way I made this dish, which may be slightly different in comparison to the original recipe.

Smoky Grilled Tempeh

Ingredients
  • 1 (8-oz) pkg tempeh
  • 3/4 cup vegetable broth
  • 2 tbsp soy sauce
  • 2 tbsp apple cider vinegar
  • 2 tbsp liquid smoke, hickory flavor
  • 2 tbsp olive oil
  • 2 tsp pure maple syrup
  • 2 cloves garlic, minced
Directions
  1. Whisk all of the marinade ingredients in a bowl. Set aside.
  2. Cut the tempeh in half, widthwise, then cut each half diagonally to make 4 large triangles.
  3. Bring a pot of water to boil. When the water is boiling, lower the heat to a simmer, add the tempeh, and cook for 10 minutes.
  4. Use tongs to place the tempeh in an 8x8 Pyrex dish. Pour the marinade over the tempeh. Marinate for 1 hour. Flip the tempeh occasionally to allow all sides to evenly marinate.
  5. To grill: Grease a piece of tinfoil and lay it down on the grates of the grill. Place the tempeh on the tinfoil and grill each side for 5 minutes.
This dish was really good. The only issue I had was boiling the tempeh before marinating. You are supposed to boil or steam tempeh prior to marinating to remove the bitterness tempeh tends to have. It also helps allow the tempeh to soak up the flavors more when marinating. So for this recipe, I let the tempeh simmer for 10 minutes in water and unfortunately I have a pain-in-the-butt stove. The burners are a little screwy, so I don't think the tempeh sat in the water long enough for the steam to take away all of its bitterness. The tempeh was still a little bitter after grilling, but I will say, the marinade was delicious! What wonderful flavors! Next time I make this I think I will steam the tempeh for 10-15 minutes prior to marinating. I don't trust my stove!

Friday, January 14, 2011

Thai Coconut Curry Loaded-Veggie Soup

Okay so any time I make a vegetable soup, I tend to go a little overboard with the veggies... okay, fine, A LOT overboard! I can't help myself though, I LOVE VEGGIES! And I love to cook in large amounts. I can split it up into many individual portions and freeze them! This allows me to be able to have prepared dinners on those busy school days or when I'm clueless of what to make for dinner.

So here we go, a 22-ingredient soup I put together after David's mom gave me a carton of Thai Coconut Curry broth and asked me to do something with it. Happy to take on the challenge, I began brainstorming... I glanced through a few possible recipes and then found a vegetable soup recipe on the back of the broth carton which I started to follow, but in the end, I came up with my own thing. Enjoy!

Ingredients
  • 2-4 tbsp olive oil
  • 5 cloves garlic, minced
  • 1 large onion, chopped
  • 1 (32-oz) carton College Inn Culinary Broth: Thai Coconut Curry
  • 1/2 red bell pepper, chopped
  • 1 green bell pepper, chopped
  • 1 cup cauliflower, chopped
  • 1 cup broccoli, chopped
  • 1 cup sugar snap peas
  • 1 (15-oz) can organic soy beans, drained and rinsed
  • 1 (15-oz) can organic garbanzo beans, drained and rinsed
  • 1 large zucchini, diced
  • 1 medium yellow squash, diced
  • 2 medium carrots, diced
  • 2 cups asparagus, chopped
  • 2 (15-oz) cans diced tomatoes, with juice
  • juice of 1 lime
  • 2 tsp fresh ginger, grated
  • 1 tsp curry powder
  • 1/4 tsp cayenne pepper
  • 1 (14-oz) pkg extra-firm tofu, diced
  • 1-1/2 cups light coconut milk
Directions
  1. Heat oil  in a dutch oven and saute garlic and onion for 3-4 minutes.
  2. Add the broth to the pot, followed by the bell peppers, cauliflower, broccoli, sugar snap peas, beans, zucchini, squash, carrots, asparagus, diced tomatoes, and lime juice. Stir to combine.
  3. Add the ginger, curry powder, and cayenne pepper. Stir to combine.
  4. Add the tofu and gently stir into the soup.
  5. Bring soup to a boil, then reduce to a simmer. Add the coconut milk and stir to combine. Simmer for 1 to 1-1/2 hours.

Thursday, January 13, 2011

Vegan Eggplant Bake

After a great dinner of vegan lasagna with my fabulous vegan friends, I decided to branch out a bit more and come up with some kind of eggplant parmesan dish. Here we have it, a vegan eggplant bake! This was very similar to the lasagna I made. The only changes I made were: eggplant instead of lasagna noodles, a slightly different marinara sauce, a new tofu filling (thanks to Veganomicon), different veggies in the stir-fry layer, and finally, the addition of veggie cheese (unfortunately the cheese I used contains a couple of products that make it vegan-UNfriendly, but there is vegan cheese available out there!).

Vegan Eggplant Bake

A colorful, layered bake very similar to eggplant parmesan, only better!

Ingredients
  
For the marinara sauce, modified from Veganomicon:
  • 1/4 cup olive oil
  • 2 small onions, chopped
  • 3 cloves garlic, minced
  • 1/3 cup red wine
  • 3 (15-oz) cans diced tomatoes, with juice
  • 1 (6-oz) can tomato paste
  • dried parsley
  • dried basil
  • dried oregano
  • salt 
For the filling, Tofu Ricotta from Veganomicon:

  • 1 lb extra-firm tofu
  • 2 tsp lemon juice
  • 1 clove garlic, minced
  • 1/4 tsp salt
  • Pinch of ground black pepper
  • 1/2 tsp dried basil
  • 2 tsp olive oil
  • 1/4 cup nutritional yeast flakes 
For the veggie layer:
  • olive oil
  • 1 pkg soybeans, shelled
  • 2 carrots, diced
  • 1 zucchini, diced
  • 1 yellow squash, diced
  • 1 green bell pepper, chopped
  • garlic powder
  • onion powder
  • salt
  • ground black pepper
Other:
  • 1 medium eggplant
  • sea salt
  • olive oil
  • 1 package (12 slices) veggie cheese, mozzarella flavor
  • 1/4-1/2 cup grated veggie cheese, parmesan flavor 
Directions:
  1. Prepare the marinara sauce: Combine the olive oil, garlic, and onion in a saucepan. Heat over medium heat and cook for 3-4 minutes. Add the wine and simmer for 3 minutes. Add the diced tomatoes, tomato paste, and spices. Simmer on low for at least 15 minutes, or until ready to use.
  2. Prepare the tofu ricotta: In a large bowl, mush the tofu until crumbly. Add the lemon juice, garlic, salt, pepper, and basil. Mix/mush until consistancy of ricotta cheese, 2-5 min. Add the olive oil, stir with a fork. Add the nutritional yeast and mix together all of the ingredients with a fork. Cover and refrigerate until ready to use.
  3. Roast the eggplant: Preheat the oven to 425 degrees F. Grease a baking sheet. Slice the eggplant into 1/4-1/2 inch thick rounds. Place rounds on the baking sheet and salt and brush olive oil on both sides of each slice. Bake for 10 minutes. Flip eggplant over and bake for another 5-10 minutes longer. While the eggplant is roasting, make the veggie layer. When the eggplant is ready, remove from oven and set aside until ready to use.
  4. To make the veggie layer: Heat olive oil in a large skillet. Add soybeans, carrots, zucchini, squash, and bell pepper. Season with garlic powder, onion powder, salt and black pepper, to taste. Cook until vegetables become tender. Set aside until ready to use.
  5. To make the eggplant bake: Preheat oven to 350 degrees F. Grease a 9x13 Pyrex dish. Place about 1 cup marinara sauce in the bottom of the dish. Place half of the eggplant rounds on top. Layer with half of the tofu ricotta filling, then half of the stir-fry veggies, and then 6 slices of mozzarella cheese. Sprinkle with parmesan cheese. Pour half of the remaining marinara on top. Top with the remaining eggplant, tofu ricotta, veggies, and sprinkle with parmesan cheese (omit the mozzarella on this one). Top with the rest of the marinara sauce, 6 slices of mozzarella cheese, and parmesan cheese. Cover with tinfoil and bake 50-60 min. Remove from oven and lift one end of the tinfoil to allow the bake to release steam. Let rest for at least 10 minutes before serving.
This eggplant bake was DELISH! The tofu ricotta was wonderful! To all you non-vegans, it tasted nothing like tofu! The dish was very flavorful and I have plenty for later! I was able to divide up this dish and freeze it in single servings! Perfect on those late school nights! Enjoy!

Tuesday, December 28, 2010

Freshly baked muffins for Jacki's special, and may I add incredible, Christmas Day stuffing! Yum!

So last year Jacki, David's mom, made this fantastic stuffing to go with the turkey for Christmas Day dinner. I was so excited about it that I just had to ask her how she made this stuffing. Turns out, she had seen one of Rachael Ray's stuffing recipes where she had added some flavorful muffins to her dish. So Jacki decided to use this idea into her own stuffing! Using a combination of stale bread and moist muffins, as well as the essential stuffing ingredients, the stuffing turned out wonderful!

 
Since I just loved Jacki's stuffing so much last year, I asked her if she would make it again this year! She was happy to do it, but this time I asked if I could help out by making the muffins she would be adding to the stuffing. I decided to make a variety of muffins: Cornbread - of course, the sweet kind; apple cinnamon with walnuts, thanks to Baking Bites; and cranberry orange with walnuts, thanks to For the Love of Cooking, a blog I recently started following. To the basic stuffing ingredients of sauteed onions and celery, seasoning, butter, and broth (rather than the normal chicken broth, she used a white wine and herb broth), Jacki also added a couple of cinnamon streusal muffins, chopped apples, spices (cinnamon & nutmeg) and walnuts. She decided to only use muffins this time (rather than a combo with stale bread), and the moistness of the muffins made up for a lot of the chicken broth she normally adds to her stuffing. Well the stuffing turned out great! The stuffing came out of the oven and not only smelled delicious, but had a nice, crisp top layer. And yes, I attacked it on Christmas day :)

 
Here are the recipes for the muffins used in the stuffing:

 
Apple-Cinnamon-Walnut Muffins (Original Recipe)

 
Ingredients
  • 2 cups all purpose flour
  • 2 tsp baking powder
  • 1/2 tsp salt
  • 1 tbsp ground cinnamon
  • 3/4 cup brown sugar
  • 1 large egg
  • 2 tbsp butter, melted and cooled
  • 2 tbsp vegetable oil
  • 1 tsp vanilla extract
  • 1 cup buttermilk
  • 2 Granny Smith apples, peeled, cored and shredded
  • 1/2 - 1 cup walnuts, chopped
  • 3 tbsp coarse sugar
  • 1/2 tsp ground cinnamon
Directions
  1. Preheat oven to 375 degrees F. Lightly grease (or line with paper liners) a 12-cup muffin tin .
  2. In a medium bowl, whisk together flour, baking powder, salt and cinnamon.
  3. In a large bowl, whisk together brown sugar and egg. Whisk in melted butter, vegetable oil and vanilla. Working in two or three additions, alternately stir in flour mixture and buttermilk, ending with an addition of flour and mixing only until no streaks of flour remain visible in the batter. Stir in shredded apple and chopped walnuts.
  4. Divide batter evenly into prepared muffin cups filling each to the top, or slightly over.
  5. In a small bowl, stir together coarse sugar and additional 1/2 tsp ground cinnamon. Sprinkle generously over muffins.
  6. Bake for 15-18 minutes, until a toothpick inserted into the center of a muffin comes out clean and the top springs back when lightly pressed.
  7. Cool muffins on a wire rack.
  8. Makes 12. 
Cranberry-Orange-Walnut Muffins (Original Recipe)
 
Ingredients
  • 1 cup (6-oz pkg) dried cranberries
  • 3/4 cup fresh orange juice
  • 2 cups flour
  • 1 cup sugar
  • 1 1/2 tsp baking powder
  • 1 tsp salt
  • 1/2 tsp baking soda
  • 1/2 - 1 tbsp cinnamon
  • 1 tbsp orange rind
  • 1/4 cup canola
  • 1 large egg
  • 1/2 - 1 cup walnuts, chopped
  • Coarse raw sugar
Directions
  1. Preheat the oven to 400 degrees F (see note*). Coat a 12-cup muffin tin with cooking spray.
  2. Place the dried cranberries and the freshly squeezed orange juice in a small sauce pan and heat over medium heat for 5 minutes. This helps plump up the dried cranberries.
  3. Combine the flour, sugar, baking powder, salt, baking soda, cinnamon and orange rind together until well mixed. In a separate bowl, add the orange juice, cranberries, canola oil, and egg and mix together. Pour this mixture into the dry mixture and stir until combined. Fold in chopped walnuts.
  4. Pour the mixture evenly into the prepared muffin tin. Sprinkle a bit of course raw sugar on each muffin top. Place into the oven and bake for 15 minutes or until a tester inserted in the center comes out clean. Cool on a rack for a few minutes.
* Note: I do not recommend baking these muffins at 400 degrees F due to higher risk of burning outer part of muffins before inner portion is completely baked. Recommended temperature: 350 degrees F, but will require a longer baking time of 20-25 minutes.

 
Links to Rachael Ray's Stuffing:
Cranberry Orange Stuffing
Corn Muffin Stuffing

 
Thanks again Jacki for making a fantastic stuffing!

Wednesday, November 3, 2010

Vegetarian Chili

This is what you end up with when your ground beef, that’s been sitting in the fridge, goes bad! I have never cooked with the dry beans, so I decided to give it a shot. Ok, so my first attempt at using dry beans was not a good one but it doesn't mean I won't try again. The beans seemed to be a little undercooked. I boiled them for a good amount of time before making my chili, but unfortunately it was not long enough. I made enough for an army too! It was about 4 or 5 nights in a row that David and I ate chili - yum! Believe it or not we are not even sick of it. Ha!

I really didn't mind that there was no meat in this chili. There were so many different kinds of beans and vegetables, I loved it! David would tell you otherwise, but then again, he is a "steak and potato" kind of guy...