Thank you again to everyone who participated in my first cookie exchange! Hopefully this can become an annual tradition! I'd love it! It is so much fun learning about others' favorite cookies too! Yum! So this blog is dedicated to all of my special guests!
First off, I want to give a special thanks to my sister Michelle for helping me out! She heard I was having a cookie exchange, and even though she couldn't be at the event, she chose to make cookies anyway! When I saw her during Thanksgiving she gave me a HUGE box of cookies plus a small tub of them. She told me I was allowed to taste some of the cookies out of the tub while we were together - I didn't realize she just wanted me to "taste" because before I knew it, the whole tub of cookies was empty - oops! Hey, can you blame me? They were good!!
So here are the cookies she made:
Cookie #1: Banana Oatmeal Chocolate Chip Cookies (by Michelle Gilman)
Source:
Allrecipes
 |
| Banana Oatmeal Chocolate Chip Cookies |
"So I heard that my sister Rachel was going to be having a cookie exchange. Well as much as I wanted to be there with her and help her plan everything, it just wasn’t possible. I decided, however, that I still wanted to be a part of this cookie exchange, but I didn’t want to make the same old cookies that everyone is used to. So I started researching on various websites some different kinds of cookies and I came across Banana oatmeal cookies. So I thought about it and as I was going over the ingredients, but I just felt like it was missing something. My first batch that I made was with raisins due to the fact I was thinking too much of oatmeal raisin cookies not really remembering that the recipe called for bananas as well. As I told Rachel my idea to add raisins she wasn’t that thrilled about it, but I was WAY too excited, so being the good sister she is she just went a long with it. My first batch was complete and I couldn’t wait to try them out….yeah not so good. Not a horrible cookie but I thought it could be better."
"So I went back to the drawing board and thought what mixes well with bananas, and then it hit me…OF COURSE…chocolate chips! So I called Rachel and said ok maybe raisins weren’t such a good idea…but how about chocolate chips? Well then she goes on to tell me 'yeah I think chocolate chips would be delicious, I am not that big a fan of raisins with banana bread.' Well then I was just laughing because I asked her why she couldn’t tell me that BEFORE I made a batch with raisins."
"If you love banana bread, you will love this recipe. It’s pretty much banana bread in disguise as a delicious cookie. It is definitely different, but it’s very YUMMY."
"Please enjoy these cookies and I hope everyone has a very happy holiday!!" - Michelle
Ingredients
1 ½ cups all-purpose flour, sifted
½ teaspoon baking soda
1 teaspoon ground cinnamon, heaping
¾ cup butter, softened (or shortening)
1 cup white sugar
1 egg
1 cup bananas, mashed (2-3 ripe bananas)
1 ¾ cups oats (quick or old fashioned)
1 cup walnuts, chopped
1 cup semisweet chocolate chips
Preheat oven to 400 degrees F (200 degrees C).
Sift together the flour, baking soda, salt, nutmeg and cinnamon.
Cream together the butter and sugar; beat until light and fluffy. Add egg, banana, oats, nuts, and chocolate chips. Mix well.
Add dry ingredients, mix well and drop by the teaspoon on ungreased cookie sheet.
Bake at 400 degrees F (200 degrees C) for 15 minutes or until edges turn lightly brown. Cool on wire rack. Store in a closed container.
Thank you Mishkie for making these delicious cookies! They completed my cookie exchange! You better be here next year! Love you!
I hope you enjoy the rest of these recipes! I'm so glad my guests were able to share these with me!
Cookie #2: Hermit Cookies (by Sue Schick)
 |
| Hermit Cookies |
"My story about making Christmas cookies when I grew up is that we would spend 2-3 days doing nothing else but baking dozens of cookies, including the cut outs and the spritz cookies. Then through the holidays, we always had a tray of cookies that were available all through the day and after dinner every night, we would replenish the tray and enjoy fresh cookies with milk or coffee for desert. My mother was a great cook and she kept all her cookies in Christmas cookie tins all over the house. They lasted for weeks and were usually gone by the New Years Day. " - Sue
Ingredients
- 1 cup raisins
- 1 cup dates
- ¾ cup walnuts
- 3 tablespoons hot water
- 2 ⅔ cups flour
- 1 teaspoon baking powder
- ¾ teaspoon salt
- 1 ¼ teaspoon ground cinnamon
- ½ teaspoon ground cloves
- ¼ teaspoon ground nutmeg
- 2 sticks unsalted butter
- 1 cup packed brown sugar
- ⅔ cup sugar
- 2 large eggs
- 2 ½ tablespoons milk
- 2 ½ teaspoons vanilla
- ½ teaspoon finely grated orange zest
Directions
- Preheat oven to 350 degree F.
- Combine raisins, dates, walnuts and hot water. Set aside.
- Wisk together flour, baking powder, salt, cinnamon, cloves, and nutmeg.
- Beat butter, brown sugar, and sugar on medium speed until very fluffy and well-blended.
- Add eggs, milk, vanilla, and orange zest until well-combined.
- Stir half of the flour mixture into the butter mixture until well blended and smooth. Stir in the raisin mixture, followed by the remaining flour mixture until well blended
- Drop the dough by teaspoons onto the greased baking sheet spacing about 1 1/2 inches apart.
- Bake 9-12 minutes. Remove from rack and let stand until cookies firm slightly, then transfer to cooling racks (9-10 minutes in usually enough, otherwise they are a little dark around the edges).
Cookie #3: Peanut Butter Cup Cookies (by Jenn Rodriguez)
Source:
Allrecipes
"I wanted to try something new and came across this recipe. I only saw great reviews about this cookie, so I knew it was a keeper. Happy holidays!" - Jenn
 |
| Peanut Butter Cup Cookies |
Ingredients
Preheat oven to 350 degrees.
In a medium bowl, cream the butter, white sugar, brown sugar, and peanut butter together. Stir in the egg and vanilla. Sift together the flour, baking soda and salt; stir into the creamed mixture.
Drop by tablespoonfuls into the cups of a muffin tin. Cups should be about ¼ full. Bake for 8 to 10 minutes, until lightly browned. Remove from oven and immediately press a peanut butter cup into the center of each cookie. Allow the cookies to cool completely before removing from their pan.
Cookie #4: Classic Spritz Cookies (by Peggy Reynolds-Devorak)
Source: Wilton
 |
| Classic Spritz Cookies |
"Baking brings back funny memories of when I was a newlywed… all those times I greased up pans when I wasn’t supposed to. Oops! It’s always nice to get a good laugh around the holidays."
- Peggy
Tools
- Cookie ProTM Ultra cookie press
Ingredients
- 1 ½ cups butter
- 1 cup granulated sugar
- 1 egg
- 2 tablespoons milk
- 1 teaspoon vanilla extract
- ½ teaspoon almond extract
- 3 ½ cups all purpose flour
- 1 teaspoon baking powder
Directions
- Preheat oven to 375 degrees F.
- Thoroughly cream butter and sugar. Add egg, milk, vanilla and almond extract; beat well.
- Stir together flour and baking powder; gradually add to creamed mixture, mixing to make a smooth dough. Do not chill.
- Place dough into Cookie ProTM Ultra and press cookies onto greased cookie sheet. Bake 10-12 minutes or until lightly browned around edges.
- Remove cookies from sheet; cool on rack.
- Makes 7-8 dozen cookies.
Cookie #5: Chocolate, Chocolate Chip Cookies (by Meagan Strouse)
 |
| Chocolate, Chocolate Chip Cookies |
"Whenever I bake cookies, I always take them out a minute or two before the minimum time on the recipe. The cookies will be gooey and moist, so they won't get dry and crunchy as fast as when you bake them the normal time. Brownies work with this trick too, but instead of a couple I bake them about 5 minutes less, since they have a longer bake time. To me, there is nothing like a rich, gooey cookie or brownie. You can't attack them straight out of the oven because they're too soft, but it's worth the wait to have several days of delicious cookie or brownie joy!" - Meagan
Ingredients
- 1 cup butter, softened
- 1 ½ cups white sugar
- 2 eggs
- 2 teaspoons vanilla extract
- 2 cups all-purpose flour
- ⅔ cup cocoa powder
- ¾ teaspoon baking soda
- ¼ teaspoon salt
- 2 cups semisweet or white chocolate chips
- Peppermint extract (optional)
- ½ cup candy canes, crushed or peppermint baking bits (optional)
- ½ cup walnuts, chopped (optional)
Directions
- Preheat oven to 350 degrees F (175 degrees C).
- In large bowl, beat butter, sugar, eggs, and vanilla until light and fluffy. Combine the flour, cocoa, baking soda, and salt; stir into the butter mixture until well blended. Mix in the chocolate chips and walnuts. Drop by rounded teaspoonfuls onto ungreased cookie sheets.
- Bake for 8 to 10 minutes in the preheated oven, or just until set. Cool slightly on the cookie sheets before transferring to wire racks to cool completely.
- Recipe Yield: 4 dozen
Cookie #6: Peanut Butter-Oatmeal Cookies (by Tammi Wooten & Erica Koch)
Source: Tammi’s Grandmother
 |
| Peanut Butter-Oatmeal Cookies |
"There isn't any one particular memory associated with these cookies, but many wonderful summers that my brother, cousins, and I spent at my grandmother’s house making these cookies with her. They really have that old fashion taste, and are really easy and fun to make."
- Tammi
Ingredients
- 2 tablespoons butter
- 4 tablespoons cocoa
- 2 cups granulated sugar
- ⅛ teaspoon salt
- ½ cup milk
- 3 cups quick oats
- ½ cup peanut butter
- 1 teaspoon vanilla
Directions
- Melt butter and cocoa in sauce pan.
- Add sugar, salt, and milk, and boil for one minute. Remove from fire and add quick oats, peanut butter and vanilla.
- Drop on wax paper.
- Eat when set, about 1 hour.
Cookie #7: Chocolate Raspberry Sprinkle Dip Cookies (by Cathy)
"Unfortunately, I do not have family cookie recipes since my family was not homemade people when it came to desserts. Bakery bought items – that is what we all did in my home neighborhood The Bronx, New York."
"The cookie I have chosen has been an all time favorite of mine for over 30 years (ask all my childhood friends). There were at least 5 bakeries in a two-block radius. Every cookie, cake, and pastry you could ever imagine."
 |
| Chocolate Raspberry Sprinkle Dip Cookies |
"But the chocolate raspberry sprinkle dip was the bomb. A bite of cookie, jam, chocolate and sprinkle all in one bite. Everyone ate it the same way: nibbling the sprinkles, savoring the chocolate, then the cookie. Even when I speak to old friends from the Bronx this simple cookie brings back great memories of what old Mom & Pop bakeries were all about."
"I hope you enjoy them." - Cathy
Ingredients
- 1 package sugar cookie mix
- 1 jar raspberry jam (seedless)
- 1 jar/package melting chocolate
- 1 packaged multi-colored sprinkles
Directions
- Mix packaged cookie mix as directed.
- Bake at 375 degrees F for 8-9 minutes.
- Let cookies cool.
- Spread jam and squeeze together.
- Dip cookie into melted chocolate.
- Dip into sprinkles.
- Refrigerate cookies to harden chocolate for 10-15 minutes.
- Enjoy.
Cookie #8: Cranberry Cream Cheese Snickerdoodles (by Cathy)
 |
| Cranberry Cream Cheese Snickerdoodles |
Ingredients
- 4 oz cream cheese, softened
- ¼ cup butter, margarine or spread, softened
- 1 tablespoon water
- 1 egg
- Snickerdoodle cookie mix
- 1 cup sweetened dried cranberries
- Cinnamon sugar
Directions
- Preheat oven to 375 degrees F.
- Mix cream cheese and butter until smooth.
- Add water, egg, and cookie mix to cream cheese mixture until soft dough forms.
- Stir in cranberries.
- Cover and refrigerate for 30 minutes.
- Drop dough 2 inches apart on ungreased sheet. Sprinkle with cinnamon and sugar.
- Bake for 8-9 minutes.
Cookie #9: Old Fashioned Soft Pumpkin Cookies (by Jacki Simpson)
Source:
Libby's Pumpkin

"Growing up, I don’t recall baking cookies for the Christmas Holidays. But, it seems like it has always been traditional to have the aroma of fresh baked cookies in the house during the November and December holiday season. The aromatics of the spices used to bake cookies add to the feeling of cheer as families gather together in the kitchen to bake and enjoy cookies. The gloominess that comes with the change of the season is more tolerable when you have the warmth and smell of freshly baked cookies and spices throughout the house."
"I began making cookies during the holidays the first year in housekeeping. It became traditional to bake many types of cookies during this season to share with others, leaving some for Santa on Christmas Eve, and eating some with hot chocolate or Russian Tea. Cookie types included: decorated sugar cookies, oatmeal cookies, and our favorite chocolate chip cookies. Through the years a few more types were added including the soft pumpkin cookie being shared today."
"As the children came along, all three (Daniel, David, and Elizabeth) would become a part of this festive time of baking. They would help mix the cookies, taste the batter, lick the beaters, cut out the cookies, decorate sugar cookies, but most of all---eat the cookies. All three liked to be a part of the activity. Each had the opportunity to leave cookies for Santa. Santa always got at least 2 cookies left for him on Christmas Eve (except for one year---the idea of cookies was not tolerated and a plate of carrots was left instead…). I think Santa preferred visiting when cookies were left on a plate with a glass of milk, after all the cookies were gone except for some crumbs and the milk was almost empty except for a few sips." - Jacki
Ingredients
 |
| Old Fashioned Soft Pumpkin Cookies |
- 2 ½ cups all-purpose flour
- 1 teaspoon baking soda
- 1 teaspoon baking powder
- 1 teaspoon ground cinnamon
- ½ teaspoon ground nutmeg
- ½ teaspoon salt
- ½ cup butter, softened
- 1 ½ cups granulated sugar
- 1 cup Libby’s Solid Pack Pumpkin
- 1 egg
- 1 teaspoon vanilla extract
- Glaze (recipe follows)
Directions
- Combine flour, baking soda, baking powder, cinnamon, nutmeg and salt in medium bowl. Cream butter and sugar in large mixer bowl. Add pumpkin, egg and vanilla, beat until light and creamy. Mix in dry ingredients until well blended.
- Drop by rounded tablespoons onto greased cookie sheet. Smooth topes of cookies.
- Bake in preheated 350º oven for 15 to 20 minutes. Cool on wire racks. Drizzle glaze over top.
- Glaze: Combine 2 cups sifted powdered sugar, 3 tablespoons milk, 1 tablespoon melted butter and 1 teaspoon vanilla extract into small bowel until smooth.
** For variation: stir any of the following into batter: 1 cup raisins, 1 cup chopped nuts, 1 cup rolled oats, ½ cup crushed pineapple (drained).
Cookie #10: David’s Favorite Candy - Chocolate Mints (by Jacki Simpson)
 |
| Chocolate Mints |
Ingredients
- 1 lb confectioner’s sugar
- 1 stick margarine or butter (softened)
- 1 teaspoon flavoring (mint extract, etc.)
- 4 squares semi-sweet chocolate
- ½ stick paraffin wax
Directions
- Mix confectioner’s sugar, margarine & flavoring together. Use hands to form into a large ball. Refrigerate for a couple of hours. Form candies into 1 inch balls.
- In double boiler, mix 4 squares semi-sweet chocolate and paraffin wax. Melt & mix. Dip candy balls into chocolate sauce and place on waxed paper to harden.
- For best results, freeze the candy balls prior to dipping in chocolate.
Cookie #11: Ooey Gooey Chocolate Butter Cookies (by Barbara Roberts)
Source:
Paula Deen
 |
| Ooey Gooey Chocolate Butter Cookies |
Ingredients
- 1 (8-oz) brick cream cheese (room temperature)
- 1 stick butter (room temperature)
- 1 egg
- 1 teaspoon vanilla extract
- 1 (18-oz) box moist chocolate cake mix
- Confectioner’s sugar, for dusting
Directions
- Preheat oven to 350 degrees F.
- In a large bowl with an electric mixer, cream the cream cheese and butter until smooth. Beat in the egg. Then beat in the vanilla extract. Beat in the cake mix.
- Cover and refrigerate for 2 hours to firm up so that you can roll batter into balls. Roll the chilled batter into tablespoon-sized balls and then roll them in confectioner’s sugar.
- Place on ungreased cookie sheet, 2 inches apart. Bake 12 minutes. The cookies will remain soft and “gooey”.
- Cool completely and sprinkle with more confectioner’s sugar, if desired.
Cookie #12: Rugelach (by Rachel Gilman)
Source:
Diana's Desserts
If you are looking for a challenge, you have come to the right place! I didn’t know how time-consuming this special cookie was! It is worth it though! Rugelach is a Jewish pastry filled with nuts, cinnamon, sugar! This is a traditional kind of cookie served on Hanukkah!
Since this was my first time making these cookies, I was a little worried about how the turn out would be. After approval from my neighbor, who grew up in New York and was in walking distance of several "mom & pop" bakeries, I knew all my hard work had paid off!
I do want to give a special thank you to my Aunt Karen. I decided to use her homemade "peach melba" jam for the filling in some of these cookies. The jam was perfect - the cookie couldn't have been more delicious!
 |
| Rugelach |
Ingredients
- 2 cups all-purpose flour
- ½ teaspoon salt
- 1 cup (2 sticks/8 oz/226g) unsalted butter, softened
- 8 oz cream cheese, softened
- ½ cup plus 4 teaspoons granulated sugar
- 1 teaspoon ground cinnamon
- 1 cup jam (raspberry, blackberry, apricot preserves, or any jam of your choice)
- 1 cup loosely packed golden raisins, chopped
- 1 ¼ cups walnuts (¼ lb), finely chopped
- Milk for brushing cookies
Special equipment
Directions
- Whisk together flour and salt in a medium bowl. In a large bowl, beat together butter and cream cheese with an electric mixer until combined well. Add flour mixture and stir with a wooden spoon until a soft dough forms. Gather dough into a ball and wrap in plastic wrap, then flatten (in wrap) into a roughly 7- by 5-inch rectangle. Chill until firm, 8 to 24 hours.
- Put oven rack in middle position and preheat oven to 350 degrees F. Line bottom of a 1- to 1 ½-inch-deep large shallow baking pan with parchment paper.
- Cut dough into 4 pieces. Chill 3 pieces, wrapped in plastic wrap, and roll out remaining piece into a 12- by 8-inch rectangle on a well-floured surface with a floured rolling pin. Transfer dough to a sheet of parchment, then transfer to a tray and chill while rolling out remaining dough in same manner, transferring each to another sheet of parchment and stacking on tray.
- Whisk ½ cup sugar with cinnamon.
- Arrange 1 dough rectangle on work surface with a long side nearest you. Spread ¼ cup preserves evenly over dough with offset spatula. Sprinkle ¼ cup raisins and a rounded ¼ cup walnuts over jam, then sprinkle with 2 tablespoons cinnamon sugar.
- Using parchment as an aid, roll up dough tightly into a log. Place, seam side down, in lined baking pan, then pinch ends closed and tuck underneath. Make 3 more logs in same manner and arrange 1 inch apart in pan. Brush logs with milk and sprinkle each with 1 teaspoon of remaining granulated sugar. With a sharp large knife, make 3/4-inch-deep cuts crosswise in dough (not all the way through) at 1-inch intervals. (If dough is too soft to cut, chill until firmer, 20 to 30 minutes.)
- Bake until golden, 45 to 50 minutes. Cool to warm in pan on a rack, about 30 minutes, then transfer logs to a cutting board and slice cookies all the way through.
- Makes about 44 cookies.
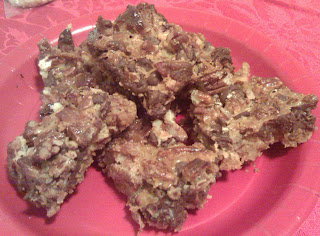
Cookie #13: Hello Dollies (by Rachel Gilman)
Source: Mom!
 |
| Hello Dollies |
My mom always made these during the holidays when we were growing up! We could never get enough of them! It is really hard to eat just one. My sister, Michelle, and I would always watch my mom makes these, just waiting for her to finally say “Okay! You can have one!”
Ingredients
- ¼ lb butter (1 stick)
- 1 cup graham cracker crumbs
- 1 cup coconut
- 1 cup chocolate chips
- 1 cup nuts
- 1 can sweetened condensed milk
Directions
- Preheat oven to 350 degrees F.
- Melt butter in 3-quart glass pan.
- Press graham cracker crumbs into the pan.
- Layer the rest of the ingredients on top of the graham cracker crumbs.
- Cover with milk.
- Bake for 30 minutes.
Cookie #14: White Chocolate Macadamia Nut Cookies (by Rachel Gilman)
Source:
Allrecipes
 |
| White Chocolate Macadamaia Nut Cookies |
Ingredients
- ½ cup butter
- ¾ cup white sugar
- 1 egg
- 1 teaspoon vanilla extract
- 1 ¼ cups all-purpose flour
- ½ teaspoon baking soda
- ½ teaspoon salt
- 8 ounces white chocolate, chopped (or 1-2 cups white chocolate chips)
- 1 (6.5 ounce) jar macadamia nuts, chopped
Directions
- Preheat oven to 375 degrees F.
- In a medium bowl, cream together the butter and sugar. Stir in the egg and vanilla. Combine the flour, baking soda and salt, stir into the creamed mixture. Finally, stir in the white chocolate and nuts. Drop cookies by heaping teaspoonfuls onto an ungreased cookie sheet, about 2 inches apart.
- Bake for 8 to 10 minutes in the preheated oven, until lightly browned. Cool on wire racks. When cool, store in an airtight container.
Thank you again for all the fabulous recipes! I hope you all enjoy this special post! Happy Holidays!
 |
For the guests of my first cookie exchange:
Rugelach, Hello Dollies, and White Chocolate Macadamia Nut cookies
plus homemade recipe booklets of all the cookies made for this special event.
Cheers! |


 Unfortunately, my bread didn't rise as much as I would have wanted it to, so I didn't take a picture (to spare my embarrassment LOL). I don't know if my yeast wasn't activated enough (water may have been too warm, potentially killing the yeast) or if I had accidently formed the dough into something too long and wide. Who knows, I will do better next time!
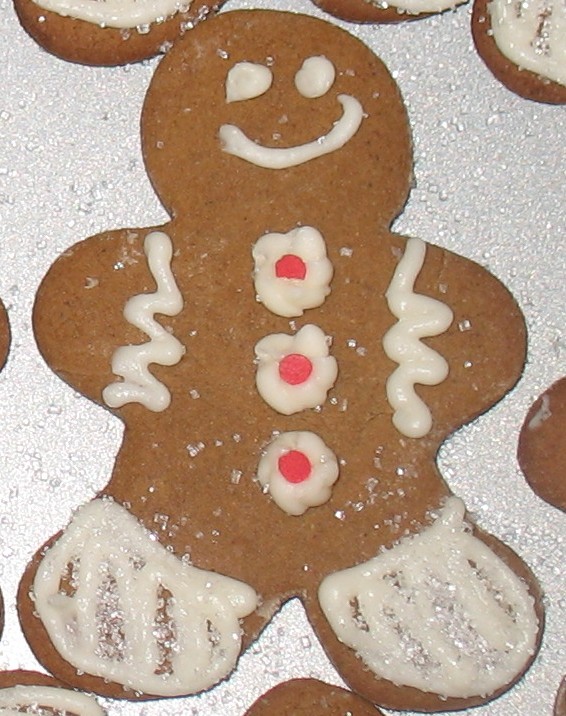
 For dessert, I made David's favorite... Gingerbread Cookies! I made one big cookie for him with lots of little heart-shaped cookies on the side. Since this was all for David, I did not "veganize" the recipe... they are perfect the way they are :)