Pages

Showing posts with label Cake. Show all posts

Wednesday, April 6, 2011

March 12, 2011 Recipe #7: Chocolate Peanut Butter Cupcakes

Moving right along with The 2011 Cookbook Challenge, I was definitely in the mood for some chocolate! Where did I go wrong though?! These cupcakes look delicious! BUT, I did it... I screwed them up. However, the chocolate peanut butter frosting on top was delicious! And I decorated them with some confectioner's sugar :)

So on to these cupcakes though.... just awful... I've been reading how whole wheat flours are better for you than white all-purpose flours, so I decided to use whole wheat pastry flour in place of the all-purpose flour. BIG MISTAKE. The cupcakes ended up a bit too dense and weren't flavorless, but the flavor just wasn't there. I ended up throwing them all away :(

Now, I will tell you though, there are certain recipes where you can make this clean substitute, using whole wheat flour instead of all-purpose flour. Unfortunately, it just doesn't go over so well when making cupcakes. Muffins, on the other hand, taste great with this substitution!

Well I knew this was bound to happen sometime with this challenge... some are winners, and some not so much. Moving on!

Sunday, April 3, 2011

Fun with Fondant! Spending Quality Time with Family!

Mishkie and Mom came out to visit in February and we decided to have a little fun with fondant! We've been wanting to play around with fondant lately to practice for my bestfriend's (or maybe I should say other sister's) wedding cake! To stay away from any time conflicts we could possibly have the week before her wedding though, we decided we will just make her a 1-year anniversary cake, which will be put on display at her wedding! So until then, we all decided it's best to keep practicing! 


Previously, I made fondant for the first time from a marshmallow base. It was a little tough to work with, but overall, I had a good experience with it. So for the next homemade fondant, we decided we wanted to try making one that might be a little easier to work with, plus we wanted to see if there was a recipe out there that called for ingredients we had on hand. Leave it to Allrecipes to give us something to try! Yay!

Rolled Buttercream Fondant (Original Recipe)

Ingredients
  • 1/2 cup light corn syrup
  • 1/2 cup shortening
  • 1/4 teaspoon salt
  • 1/2 teaspoon clear vanilla extract
  • 1 lb. confectioners' sugar
Directions
  1. In a large bowl, stir together the shortening and corn syrup.
  2. Mix in the salt and vanilla flavoring.
  3. Gradually mix in the confectioners' sugar until it is a stiff dough.  Add more confectioners' sugar until it is smooth.
  4. Store in an airtight container at room temperature or in the refrigerator until ready to use.
  5. *Note: This recipe is best made with a stand mixer, using the dough hook attachment.
This fondant recipe had it's advantages and, unfortunately, disadvantages. The fondant was extremely easy to work with and mold, making it less stressful on first-time fondant users. AND we happened to have the ingredients already available, so we didn't need anything too special to put this together. But it was a softer type of fondant, so if you played with it too much, it just got softer, almost to the point of melting (but not quite). Now, there are actually solutions to this, but we didn't figure them out until we were done, such as the addition of more confectioner's sugar (but careful on the amount added, as you don't want the fondant to crack) OR the addition of cornstarch (I really wish we had tried the cornstarch!). 

Enjoy!  


Friday, April 1, 2011

March 7, 2011 Recipe #5: Strawberry Cupcakes

It's about time I updated you on my 2011 Cookbook Challenge! Yes, I know... it has been too long and I broke my promise by screwing up the recipe order from the sequence originally generated. I have a good excuse though! I got stuck on a recipe that I wasn't in the mood to make at the time (it was one of those recipes better to make during the holidays...) so I procrastinated. And well, if any of you know me, I put the PRO in procrastination! UNTIL, I decided that the order didn't really matter, as long as I eventually did all of the recipes in The Joy of Vegan Baking before the end of the year. BUT, if I do happen to be clueless of what recipe I want to make next, I'll go back to my generated sequence and follow that. Deal?! LOL


Ok, enough about my kvetching....

Let's get to the topic of strawberry cupcakes!! Mmm, mmm, mmm....
DELISH!!

While Mallory, Eric and Sloane were visiting, the Strawberry Festival happened to be in town, so we all went to check it out. Of course, we couldn't come home empty handed.... we brought back lots and lots of delicious strawberries!! Perfect for the strawberry cupcakes!

The cupcakes were amazing. I haven't always been huge on "fruity" baked goods but the amount of strawberries used in this recipe was just right! Sweet, not too fruity, and so delicious!

The strawberries were pureed in a food process before being added to the batter. The cupcakes were topped with a vegan buttercream frosting and a fresh strawberry! This recipe is a keeper! Let me know if you want this recipe - I'd be happy to share!


Monday, January 17, 2011

A healthier, yet delicious, option for your sweet tooth: Pumpkin Crumb Cake with Pecan Streusel

Going strong with my "healthy dessert" New Year's resolution, I decided to try out a yummy cake recipe in Veganomicon. I only made slight changes to the recipe, such as raw vs granulate sugar and almond vs soy milk. Other than that, I followed the recipe to a tee and it was delicious! I think David enjoyed it the most! Who knew David would like something VEGAN!


Veganomicon's Pumpkin Crumb Cake with Pecan Streusel

Ingredients

For the pecan streusel:
  • 1/4 cup all-purpose flour
  • 3 tbsp brown sugar
  • 1/4 tsp ground cinnamon
  • 1/4 tsp ground allspice
  • 1 tbsp canola oil
  • 1 cup pecans, coarsely chopped
For the cake:
  • 1 (15-oz) can pumpkin
  • 3/4 cup almond milk
  • 3/4 cup canola oil
  • 1-1/2 cups turbinado sugar (raw)
  • 3 tbsp molasses
  • 2 tsp pure vailla extract
  • 2-2/3 cups all-purpose flour
  • 1 tbsp baking powder
  • 1 tsp salt
  • 1-1/2 tsp ground cinnamon
  • 3/4 tsp ground nutmeg
  • 3/4 tsp ground ginger
  • 1/2 tsp ground allspice
  • 1/8 tsp ground cloves
Directions
  1. Preheat the oven to 350 degrees F. Grease a 9x13 baking dish.
  2. To make the streusel: In a small bowl, mix the flour, brown sugar, and spices. Drizzle in the canola oil and mix until crumb form. Add the pecans and mix.
  3. To make the cake: In a large bowl, mix the pumpkin, milk, oil, sugar, molasses, and vanilla. In a medium bowl, sift the flour, baking powder, salt and spices. Add the flour mixture (dry ingredients) to the pumpkin mixture (wet ingredients) and stir to combine. Do not overmix. Pour the batter into the prepared baking pan. Scatter the streusel evenly on top. Bake for 45-50 min, or until a toothpick inserted into the center comes out clean.
Not only is the cake moist and delicious, but the streusel topping is amazing! Enjoy!

Monday, January 3, 2011

A Great Dinner & Dessert for My Vegan Friends!

My friend Shannon and her husband, Chris, came to visit David and I for New Year's. Since they were traveling quite a long way (from North Carolina), I wanted to cook up something special for them when they arrived! My only challenge I now faced was to make a vegan dinner! Something I had yet to try! I have become very interested in my guests' vegan lifestyle, and have researched quite a bit about it. I recommend checking out their blog at The Road Less Traveled. I've learned about different vegan foods, how to save money, and how to help make our environment greener!

 
So I began browsing vegan recipes to figure out exactly what I would make them for dinner! Perfect! I would make lasagna! All though this was not going to be an easy task, I was set on making this after reading good reviews about different vegan lasagna recipes. I decided to prepare the lasagna the day before. That way, I could take my time putting it together and I could let the lasagna marinate in its flavors and juices for a day.

 
Vegan Tofu-Veggie Lasagna

 
To make this dish, I took the ideas for a vegan lasagna from two different recipes:

 
Ingredients
  • 1 (8-oz) pkg lasagna noodles (egg-free)
For the marinara sauce:
  • 2 tbsp olive oil
  • 2 onions, chopped
  • 3 tbsp garlic, minced
  • 1 (15-oz) can tomato sauce
  • 3 (15-oz) cans diced tomatoes
  • 1 (6-oz) can tomato paste
  • dried basil
  • dried parsley
  • dried oregano
  • salt
  • ground black pepper
For the "ricotta" filling:
  • 1 (10-oz) pkg fresh spinach, steamed and drained
  • 2 tbsp garlic, minced
  • 1/2 a lemon, juiced
  • 1/2 tsp salt
  • 2 (1-lb) packages tofu, one pkg extra firm and one pkg soft
  • onion powder
  • dried basil
  • dried parsley
  • ground black pepper 
For the veggie layer:
  • 1-2 tbsp olive oil
  • 2 small yellow squash, diced
  • 1 large zucchini, diced
  • 2-3 tbsp garlic, minced
  • 1 small head broccoli, chopped, stem discarded
  • 2 carrots, diced
  • 1 red bell pepper, diced 
Directions
  1. Make the sauce: In a large, heavy saucepan, over medium heat, heat the olive oil. Place the onions in the saucepan and saute them until they are soft, about 5 minutes. Add the garlic; cook 5 minutes more.
  2. Place the tomatoes, tomato paste, basil and parsley in the saucepan. Stir well, turn the heat to low and let the sauce simmer covered for 1 hour. Add the salt and pepper.
  3. While the sauce is cooking bring a large kettle of salted water to a boil. Boil the lasagna noodles according to the package's instructions, then drain and rinse well.
  4. Preheat the oven to 350 degrees F.
  5. Place the tofu blocks in a large bowl. Add the spinach, garlic, onion powder, basil and parsley. Add the salt and pepper, and mash all the ingredients together. Mix well. Place in the refrigerator until ready to assemble lasagna.
  6. Saute the vegetable layer: In a large skillet, heat oil over medium heat. Add all ingredients and saute until vegetables become tender. Remove from heat.
  7. Assemble the lasagna: Spread 1 cup of the tomato sauce in the bottom of a 9x13 inch casserole pan. Arrange a single layer of lasagna noodles, sprinkle one-third of the tofu mixture over the noodles. Distribute 1/3 of the sauteed vegetables evenly over the tofu. Next ladle tomato sauce over the tofu, and top it with another layer of the noodles. Then sprinkle another 1/3 of the tofu mixture over the noodles, top with 1/3 of the sauteed vegetables, then the tomato sauce, and top with a final layer of noodles. Finally, top the noodles with the final 1/3 of the tofu and sauteed vegetables, and spread the remaining tomato sauce over it.
  8. Cover the pan with foil and bake the lasagna for 45-60 minutes. Serve hot and enjoy. 
The next time I make this, I would like to try roasted, thinly-sliced rounds of eggplant (possibly dipped in bread crumbs to give them a nice, crisp texture) in place of the lasagna noodles. I would also add some veggie cheese the next time: a combination of mozzarella and parmesan subsitutes. Yum! I did not add the veggie cheese this time because it unfortunately contains a couple of ingredients that are not vegan. There are veggie cheeses out there that are vegan but my grocery store is so small that they don't carry it... sad. When I try this recipe with these other ideas I will post it!

Now I could not forget about dessert! I wanted to do something special because not only did Shannon and Chris drive so far to come visit us, but they were also recently married (back in July)! So I decided I wanted to make a cake for them to celebrate their marriage! I've been in a Hawaiian-themed mood (probably because my parents were just there) so I decided to take the banana bread recipe I normally make and turn it into a cake with, yep, you guessed it, Hawaiian ingredients a.k.a. pineapple, coconut, and macadamia nuts!

Now, because this banana bread is not vegan, I had to make a few subsitutions! Most importantly, I needed a substitution for the eggs. So in baked goods, eggs are very important for two different reasons: 1.) leavening and 2.) binding. In order to have both of these important effects incorporated into the recipe without eggs I researched a bit and found a recipe from The Vegan Wolf  which is a great substitute for cakes, muffins and quickbreads. And it worked great!

Egg Substitute (equivalent to 1 egg)

Ingredients
  • 1 tbsp ground flax seeds
  • 1 tbsp cornstarch
  • 1 tbsp vegetable oil
  • 2 tbsp water
Directions
  1. Stir together all ingredients until a thick paste forms. Let sit until ready to incorporate into recipe.  
Vegan Ho`olaule`a Cake

 
Ho`olaule`a means Hawaiian celebration! Perfect for my guests who were just married over the summer.

 
Ingredients

For the egg subsitute (equivalent to 3 eggs):
  • 3 tbsp ground flax seeds
  • 3 tbsp cornstarch
  • 3 tbsp vegetable oil
  • 1/4 cup + 2 tbsp (1/8 cup) water
For the cake:

  • 3 cups all-purpose flour
  • 1 teaspoon baking soda
  • 1 teaspoon salt
  • 1/2 teaspoon baking powder
  • 1-2 tablespoons ground cinnamon
  • 2 cups raw sugar
  • 1 cup vegetable oil
  • 1 (8-oz) can crushed pineapple in water
  • 1 tablespoon vanilla extract
  • 4 ripe bananas, peeled and mashed
  • 1 cup shredded coconut
  • 1 cup macadamia nuts, chopped
For the frosting:
  • 8 oz. cream cheese substitute (Tofutti)
  • 1/4 cup light coconut milk
  • 1 tsp vanilla extract
  • 1/4 tsp coconut extract
  • 1 lb (16 oz) organic powdered sugar
  • 1 cup shredded coconut 
Directions

  1. Preheat the oven to 325 degrees F.
  2. Grease and flour two 9-inch cake pans
  3. In a large bowl, combine all egg susbtitute ingredients and stir until a thick paste forms. Set aside.
  4. To prepare the cake: Whisk the flour, baking soda, salt, baking powder, and cinnamon in a medium bowl to blend. Set aside.
  5. In the large bowl with the egg substitute, beat in the sugar, oil, crushed pineapple and vanilla to blend. Add the dry ingredients and stir just until blended.
  6. In a small bowl, stir together the banana, coconut, and macadamia nuts. Then fold into the batter.
  7. Divide the batter evenly among the cake pans. Bake until the tops are golden brown and a toothpick inserted into the center comes out with no crumbs attached, about 35-40 minutes. Keep an eye on the baking time. Transfer the cakes to a rack and cool before frosting.
  8. To make the frosting: Using an electric mixer, beat the cream cheese subsitute, coconut milk, and vanilla and coconut extracts in a large bowl until combined. Slowly beat in the powdered sugar until the right frosting consistancy forms. Stir in the coconut. Consistancy will be runnier than most frostings. Refrigerate for at least 30 minutes before frosting cake to allow frosting to become firmer. After frosting the cake, sprinkle with flaked coconut and chopped macadamia nuts.
This cake with the frosting was amazing. This was my first time making my very own frosting (without a recipe to follow) and I can confidently say that I did well! The only negative comment I have to make about my frosting though is that it was runnier than regular cream cheese frostings, so it was difficult to frost the sides of the cake without it trying to run down the side and accumulate at the bottom of the cake (hence, the mess I made on the cake plate). Okay, so, it was a bit of a mess but I wouldn't change a thing!

I am so glad Shannon and Chris loved the meal I prepared. My hard work payed off! Even David didn't mind it! I really think the word "vegan" throws people off. In reality, it is mostly just healthier eating. Sometimes :) You can make amazing dishes that are vegan though! You also learn to really appreciate fresh herbs and spices more!

Thanks Shannon and Chris for being such wonderful guests! We had a great time and I enjoyed learning more about the kind of vegan meals you prepare at your home! Thanks for sharing some of them with me!

Wednesday, December 29, 2010

Red Velvet Cupcakes with Cream Cheese Frosting

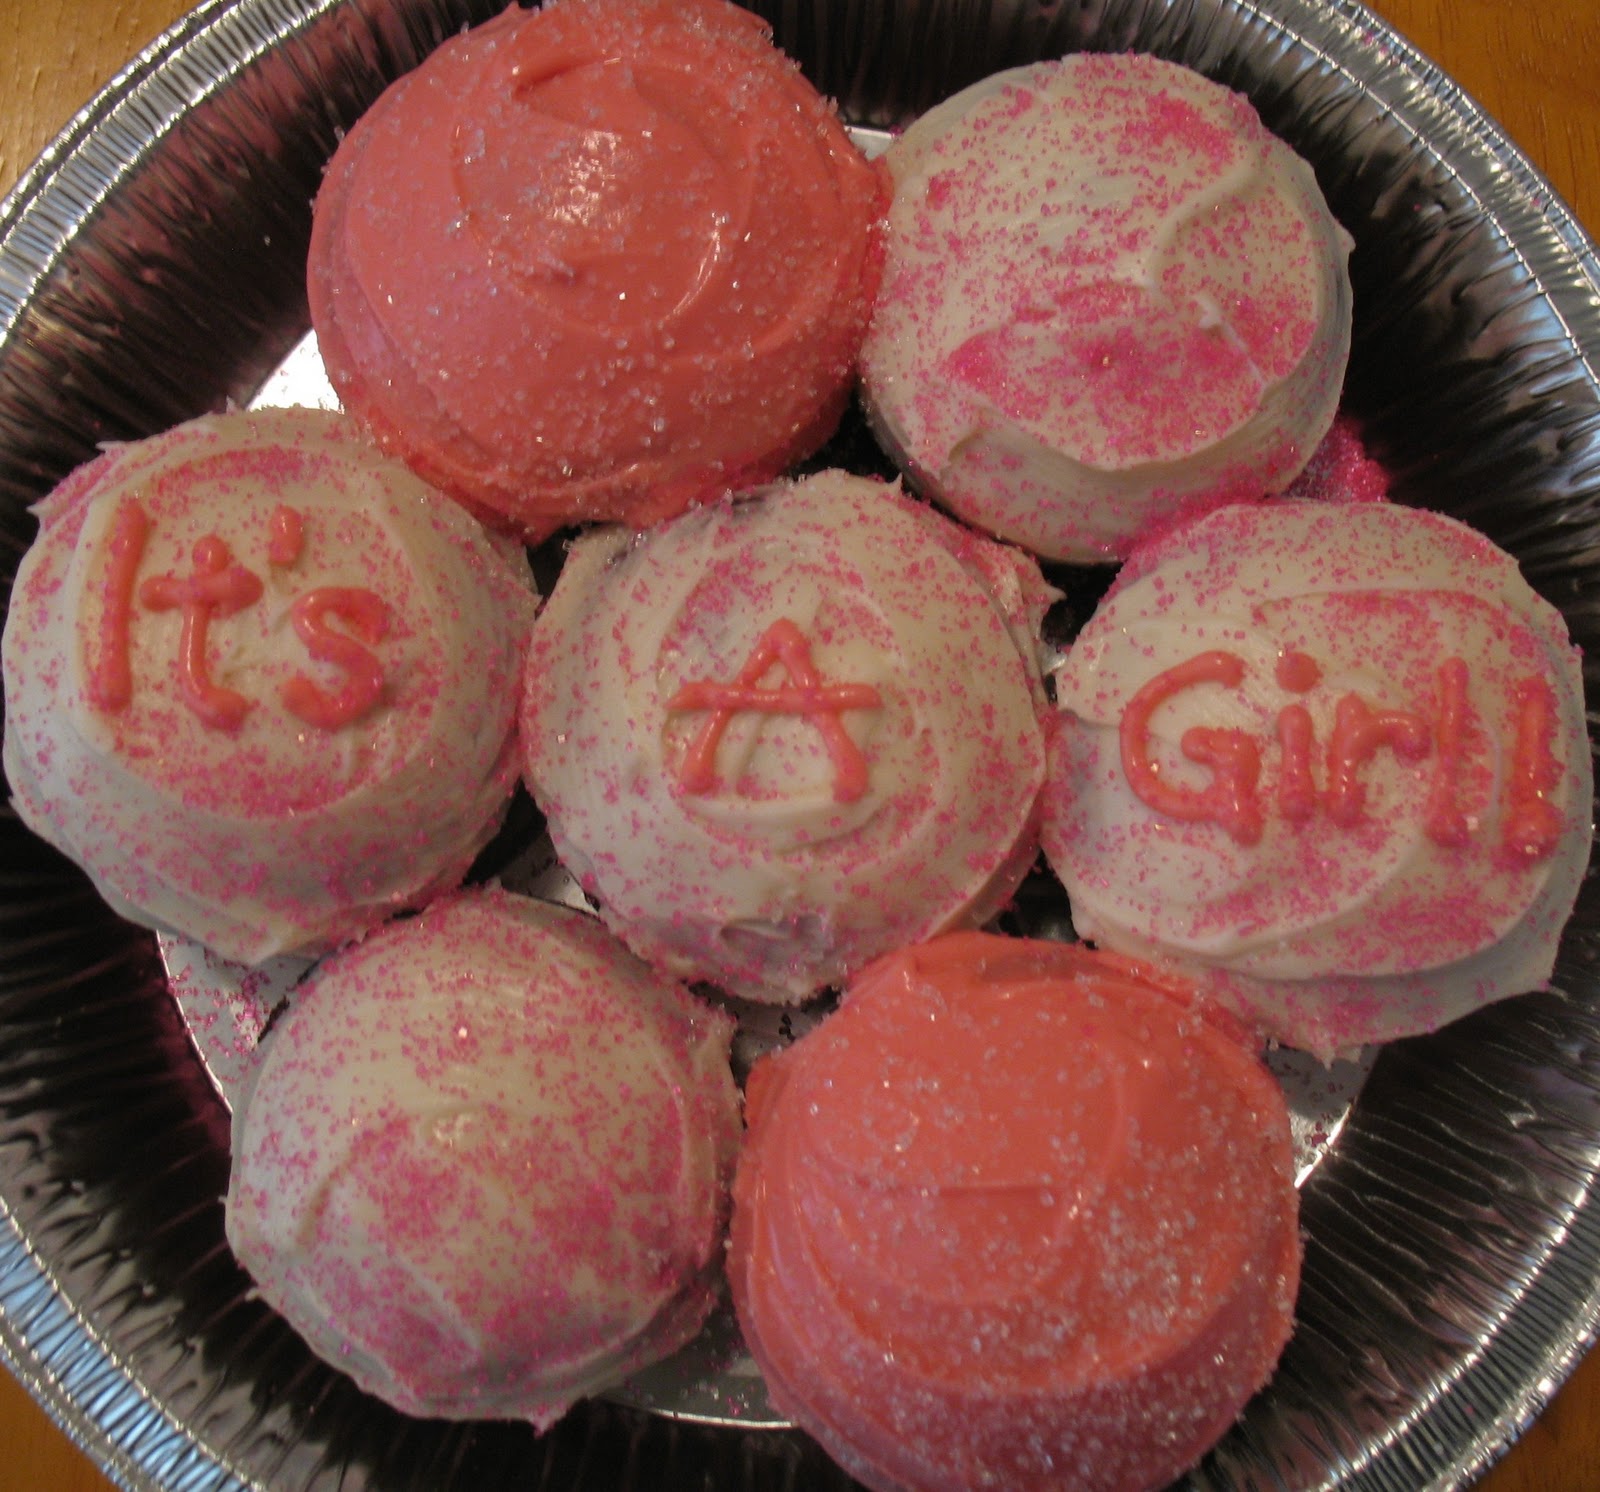
I recently found out one of my neighbor's is going to be having a baby girl! Totally excited for her, I wanted to do something special. I just think making baked goods for others is so much fun! I love to share my passion with others and they always make great little gifts!

I remembered I had some leftover buttermilk in the fridge from previously making red velvet cake to celebrate Liz's graduation and birthday. So I thought, PERFECT... I will make red velvet cupcakes! This time I had the right amount of red food coloring (2 oz) to go into the recipe though!

I decided to go with a cream cheese frosting, compared to the previous frosting I used (beautiful thick white frosting). Yum! I made up a cute little plate for my neighbor and delivered it to her shortly after! She was definitely surprised! I'm glad she was happy though! Since it was just before Christmas too, I decorated the rest of the cupcakes with holiday sprinkles, which went to another neighbor and David's work! Everyone loved them- so sweet, moist, and delicious! Enjoy!

Thursday, December 23, 2010

To Liz: Happy Birthday to the Newest Grad!

  
The newest grad, Liz, and her proud auntie, Arabrab!
Happy Birthday Liz! Congrats on your amazing accomplishments!

The double events for Liz called for a little celebration! And oh boy, did we celebrate! Eh hem, Auntie Barbie, yes I'm referring to you and your "wine" celebrating! We decided to make a nice dinner, and of course, end it with some delicious cake! Yum!

This was a perfect opportunity to attempt the art of Fondant! Oh boy, this was going to be a challenge, but knew I may as well start practicing now since my mom, sister and I will be making Heather's (my other sister's :)) wedding cake! Time to start practicing!

So for those of you who don't know what fondant is, it's a type of hardened "icing" on a cake. Its consistancy is very similar to Play-doh!

To learn more about fondant, here are some links to check out:

I found a fondant recipe on Allrecipes. It's actually not the typical fondant used, but it seemed fun and easy for a first attempt at it! This is a marshmallow fondant. I happened to have jumbo marshmallows that I decided to use! The original recipe calls for a package of miniature marshmallows, but since I have a scale the jumbo ones were used!

Marshmallow Fondant

Ingredients 
  • 1/4 cup butter
  • 16 ounces marshmallows
  • 4 tablespoons water
  • 1 teaspoon vanilla extract
  • 2 pounds confectioners' sugar, divided plus more for kneading!
Directions
  1. Place the butter in a shallow bowl, and set aside.
  2. Place the marshmallows in a large microwave-safe bowl, and microwave on High for 30 seconds to 1 minute to start melting the marshmallows. Carefully stir the water and vanilla extract into the hot marshmallows, and stir until the mixture is smooth. Slowly beat in the confectioners' sugar, a cup at a time, until you have a sticky dough. Reserve 1 cup (plus more) of powdered sugar for kneading. The dough will be very stiff.
  3. Rub your hands thoroughly with butter, and begin kneading the sticky dough. As you knead, the dough will become workable and pliable. Turn the dough out onto a working surface dusted with confectioners' sugar and continue kneading until the fondant is smooth and no longer sticky to the touch, 5 to 10 minutes.
  4. Form the fondant into a ball, wrap it tightly in plastic wrap, and refrigerate overnight. To use, allow the fondant to come to room temperature, and roll it out onto a flat surface dusted with confectioners' sugar.

So a small issue with my fondant: after two pounds of confectioner's sugar was added to make the  dough, I realized I still had a very sticky dough. As I was kneading the dough, it just clung to my hands! So I decided it would be a good idea to add more confectioner's sugar! Sticking to my hands like crazy, I went to grab for more confectioner's sugar, and everything I touched had dough on it... I should've taken pictures! It was on the microwave, on the confectioner's sugar container, all over the counter-top... I mean everywhere! But the addition of more confectioner's sugar solved my sticky dough problem!
I let the dough refrigerate overnight and during that time started making the cake! I decided on a red velvet cake, something I had never tried before!
I found the recipe for red velvent cake on Allrecipes and made slight changes based on the reviews!
Red Velvet Cake

Ingredients
  • 1/4 cup unsweetened cocoa powder
  • 2 ounces red food coloring
  • 1 cup buttermilk
  • 1 teaspoon salt
  • 1 teaspoon vanilla extract
  • 1 cup oil
  • 2 cups white sugar
  • 2 eggs
  • 2 1/2 cups all-purpose flour, sifted
  • 1 1/2 teaspoons baking soda
  • 1 teaspoon white vinegar
Directions
  1. Grease and flour two 9 inch round pans. Preheat oven to 350 degrees F. Make a paste of cocoa and food coloring. Set aside.
  2. Combine the buttermilk, salt and 1 teaspoon vanilla. Set aside. In a large bowl, cream together the shortening and 1 1/2 cups sugar until light and fluffy. Beat in the eggs one at a time, then stir in the cocoa mixture. Beat in the buttermilk mixture alternately with the flour, mixing just until incorporated. Stir together baking soda and vinegar, then gently fold into the cake batter.
  3. Pour batter into prepared pans. Bake in the preheated oven for 30 minutes, or until a toothpick inserted into the center of the cake comes out clean. Allow to cool completely before frosting. Refrigerate until ready to serve.
When I began making this cake, I decided to weight out the amount of food coloring  the recipe called for. Well, after emptying two small containers of red food coloring and only having a total weight of 0.5 ounces, I was thinking something was wrong! So rather than using the full 2 ounces the recipe called for, I stuck with the half ounce, thinking it was more than enough food coloring! 

Birthday girl cutting the cake and smirking
because of something Arabrab said!

The cake turned out beautifully! Allowing the cakes to cool before frosting, I began on the traditional frosting used for red velvet cakes, which turns out, is not cream cheese frosting! The traditional frosting is cooked over low heat with milk and flour, then once it thickens and cools, it is stirred into a creamed mixture of sugar, butter and vanilla extract. BUT I had a problem - after making this frosting TWICE and having the same outcome - the butter and milk separating - I decided I would have to go with a different frosting recipe! Completely upset about my frosting error that not only happened once, but twice, I began reading up on what I could have done wrong! Here is the first issue: the type of milk you are using. This recipe needs whole milk, which I didn't have. The second issue is that this frosting needs to be kept refrigerated. It has a tendency to separate at room temperature. Ok, absolute frosting FAIL!

So I began looking for a new recipe and after hours of searching for the right one, I found it!!

The Perfect Frosting for Red Velvet Cake (click link to view website)
Beautiful Thick White Frosting

Ingredients
  • 1 1/2 cup sugar
  • 1/2 teaspoon cream of tartar
  • 1/8 teaspoon salt
  • 1/2 cup water
  • 4 egg whites (at room temperature) 
Directions
  1. Combine sugar, cream of tartar, salt and water in heavy saucepan. Cook over medium heat, stirring constantly, until mixture is clear. Cook until mixture reaches 240°F on a candy thermometer (soft ball stage).
  2. Beat egg whites until soft peaks form. Let mixer continue to run and slowly pour the sugar mixture in a thin stream down the side of the mixer bowl (don't let the sugar mixture come into contact with the beaters). Continue beating until stiff peaks form and frosting thickens to desired consistency. 
The frosting was used for the filling between the two cake layers and to frost the top and sides of the cake. Frosting the cake before laying the fondant down helps the fondant stick to the cake better! Make sure it is a thin layer of frosting, or else your fondant will look distorted once it is layed on the cake. And you only get one chance to lay the fondant on the cake!

Believe me, I am speaking from experience! Luckily, I had more than enough extra fondant, because I had to do it all over again after ripping the fondant off the cake with half of the frosting the first time because of too much frosting on the tops and sides of the cake. It was such a mess and it made the fondant not have a very "smooth" appearance. So trial number one's rolled out fondant was trashed, and trial number two cooperated much better for me!

After all my hard work on my first try at fondant, it was a success. The cake was delicious and I'm glad I could share it with loved ones!

Sunday, December 19, 2010

Hawaiian Angel Food Cake

Angel food cake is one of the healthier cakes out there, but fair warning: it still has quite a bit of sugar in it! It is so delicious, light, and airy with that perfect amount of sweetness. I have this fabulous angel food cake recipe from Allrecipes, but I thought I would add something new to it this time. I added crushed pineapple and flaked coconut to give it that "Hawaiian" flare. With the addition of these ingredients, this may increase your baking time because the cake becomes a bit denser. Just be sure to watch your cake carefully toward the end of the baking time. 

Fresh fruit and a dollop of cool whip (or whipped cream) accompany this cake so well!

One other note: It is very important to have your egg whites at room temperature before mixing them. This allows them to become fluffier much faster and form such nice stiff peaks!

This recipe also requires a stand mixer or hand mixer. Mixing the eggs whites takes quite a few minutes for them to form into stiff peaks. I am fortunate to have a KitchenAid mixer, which allows me to multitask while the egg whites are mixing! I  can just step back and let the mixing take over!
Hawaiian Angel Food Cake

Ingredients
  • 12 eggs (1 1/2 cups egg whites (egg beaters))
  • 1 1/4 cups confectioner's sugar
  • 1 cup all-purpose flour
  • 1 1/2 tsp cream of tartar
  • 1 1/2 tsp vanilla extract
  • 1/2 tsp almond extract
  • 1/4 tsp salt
  • 1 cup sugar
  • 1 (8-oz) can crushed pineapple, with juice (optional)
  • 1/2 - 1 cup coconut, flaked (optional)
  • Fresh fruit, cut-up (optional)
  • Whipped cream or cool whip (optional)
Directions
  1. Preheat oven to 350 degrees F.
  2. Separate eggs; discard yolks or refrigerate for another use. Place in a mixing bowl; let stand at room temperature for 30 minutes.
  3. Meanwhile, sift confectioners' sugar and flour together three times; set aside.
  4. Add cream of tartar, extracts and salt to egg whites; beat on high speed.
  5. Gradually add sugar, beating until sugar is dissolved and stiff peaks form.
  6. Fold in flour mixture, 1/4 cup at a time.
  7. Carefully fold in pineapple and coconut until just incorporated.
  8. Gently spoon (or carefully pour) into an ungreased 10-in. tube pan. Cut through batter with a knife to remove air pockets.
  9. Bake for 40-45 minutes or until cake springs back when lightly touched. Immediately invert pan; cool completely before removing cake from pan.
  10. Serve cake slice with fresh fruit and a dollop of cool whip!


Wednesday, December 8, 2010

Betty's at it again! Make room for a little bit of apple goodness!!

I just can't get in enough of it - I must be going through a baking craze and I love it! I found this apple cake recipe on Diana's Desserts and after reading reviews I was ready to give this a try! This cake was delicious! I love the smell of cinnamon and apples! What a comfort :)

So I know in my earlier blogs I used to have all these funny disaster stories to share. It's been a while, but I finally have one for you! Not a huge disaster, but enough to make you laugh :) For those of you who read my baking recipes, you will know that I LOVE to top the batter of my baked goods with raw sugar before popping them in the oven. This gives the top of the cake/bread/muffins a crunchy texture that is so delicious!

Anyway, I'm using a bundt pan for this recipe, and before I'm about to pop the batter into the oven I decide to sprinkle the top of it with raw sugar! Here I am thinking this is the best idea ever! However, the oven and the sugar thought differently... Because there was so much batter in the bundt pan, the recipe called for a longer baking time - an hour and a half (see below). After about an hour of baking I went to go check on my cake and realized the raw sugar on top was starting to burn. Oh no! And the cake was nowhere near done at this point though! So I decided to take some tinfoil and cover parts of the cake that were started to burn, using as little tinfoil as possible, as I still needed to allow the cake to bake and rise properly. Well at the hour and a half mark, the top of the cake was completely burnt - crap... I let the cake cool and began brainstorming what I was going to do. When I went to remove the cake from the pan, I realized only the top of the cake was burnt from where I had sprinkled the raw sugar - the rest of the cake was baked perfectly and smelled delicious. The last thing I wanted to do was throw away all my hard work. SO I DID IT... I sliced the entire top layer off the cake, threw it out, and WAH-LA - a perfectly good cake! But as most of you know, when you use a bundt pan, the top of the cake (when baking) ends up being the bottom of the cake - so no one would ever know I had to slice a layer off! This wasn't a total disaster - and I learned something from this - the longer the baking time, the more you will upset the raw sugar! And we don't want to do that! Haha!

Enjoy this recipe! I recommend everyone tries this! It's a great substitute for apple pie too! But please, omit sprinkling the top of the batter with raw sugar - you don't want to make those little crystals of yumminess mad ;)

Chilly Day Apple Cake (click on title to view original recipe)

Ingredients 
  • 4 medium size Golden Delicious apples (about 1 1/2 pounds), peeled, cored and chopped
  • 1 cup walnuts, chopped
  • 5 tablespoons Demerara sugar (raw sugar cane crystals)
  • 1-2 tablespoons ground cinnamon
  • 2 1/2 cups granulated sugar
  • 4 large eggs
  • 1 cup vegetable oil
  • juice of 1 orange
  • 1 teaspoon vanilla extract
  • 3 cups all-purpose flour
  • 3 1/2 teaspoons baking powder
  • 1/2 teaspoon salt
  • Confectioners' sugar, for dusting cake  
Directions
  1. Preheat oven to 350°F. Grease and flour a bundt pan.
  2. Mix the apples, walnuts, Demerara sugar and ground cinnamon in a large bowl.
  3. In another bowl, combine the 2 1/2 cups granulated sugar, eggs, vegetable oil, orange juice, orange peel and vanilla extract; whisk to blend.
  4. Sift flour, baking powder and salt together; add to egg mixture.
  5. Spoon 1 1/2 cups batter into the prepared bundt pan. Top with half of the apple mixture. Cover with 1 1/2 cups batter. Top with remaining apples, then with remaining batter.
  6. Bake cake in preheated oven until top is golden brown and tester inserted near center comes out with moist crumbs attached, about 1 hour 30 minutes.
  7. Cool cake in pan on wire rack for 15 minutes. Run knife around sides of pan and center tube to loosen. Turn cake out onto rack. Cool for 1 hour.
  8. Dust cake with confectioners' sugar.
  9. Optional: Serve with vanilla ice cream or whipped cream. Store any leftover cake covered at room temperature.
  10. Yield: 8 to 10 servings.   

Thursday, December 2, 2010

Happy Hanukkah! A special dinner for the first night!


Yay! So last night was the first night of Hanukkah! Although it is extremely early this year, I wanted to do something special. I decided I would make a nice dinner for David and me: baked chicken (Mom’s method), sautéed asparagus in olive oil, and latkes (potato pancakes) with homemade chunky cinnamon applesauce! YUM! And of course for the best part: DESSERT = Chocolate Chip Pumpkin Cake with Chocolate Cream Cheese Frosting! So my picture I took of our lovely dinner doesn't really look so pretty, but the food was delicious and I want to share with you how I made everything!
 
So of course we lit the candles first (David bought me my first menorah a couple of years ago). I’m so glad he is so supportive of my traditions. And I am glad I can share this with him. 

Dinner was great! The night before our lovely dinner I decided to make homemade applesauce. I used three kinds of apples: golden delicious, granny smith, and pink lady. I make a very simple applesauce (unsweetened) that is naturally sweet and healthy!

Rachel’s Chunky Cinnamon Applesauce

Ingredients 
  • 3 golden delicious
  • 4 granny smith apples
  • 4 pink lady apples
  • 1 ½ cups water
  • 1-2 tablespoons cinnamon
Directions

1. Peel, core and chop apples. Place the apples in a large pot.
2. Add water to the pot. The water should cover the entire bottom of the pot.
3. Cover and cook the apples on medium-high heat. When the apples and water begin to boil, reduce the heat to a simmer.
4. Add the cinnamon.
5. Apples will take approximately 45 minutes until they become a sauce. Stir occasionally. Cook the apples longer if you prefer smooth over chunky applesauce.

I wanted to make the applesauce the night before because I prefer cold applesauce, rather than hot. Let me tell you, this was some good applesauce!
The baked chicken is always a favorite. My mom taught me a delicious and easy way to make chicken (on the bone): Place the chicken in a greased pan, sprinkle with salt, onion salt, and paprika, then pop it in the oven uncovered for an hour at 350 degrees!! I think David’s favorite part of this is the crispy, flavorful skin :)

The asparagus was simply sautéed in olive oil and seasoned with kosher salt and pepper. Always a favorite of David’s :)
Of course since it’s the first night of Hanukkah, I needed to make a traditional recipe: Latkes!! This was actually my first time making them! I found the recipe on http://allrecipes.com/ and modified it based on other reviews. These were delicious and the applesauce made them even better! I decided to bake the latkes, rather than fry them. Baking them is just a bit healthier!

Potato Latkes

Ingredients 
  • 2 cups potatoes, shredded (approx. 3 small Idaho potatoes)
  • 1 onion, shredded
  • 1 egg
  • 2 tablespoons matzah ball mix
  • 1 teaspoon salt
  • Cooking spray 
Directions

1. Preheat oven to 425 degrees F. Grease a baking sheet with cooking spray.
2. Mix the shredded potatoes and onion together. Add the egg, matzah ball mix, and salt. Stir to combine.
3. Drop spoonfuls of the mixture on the baking sheet. Should get approximately 8 generous-sized latkes.
4. Bake for 15 minutes, turn, then bake for 10 minutes longer, or until browned.
5. Serve with applesauce or sour cream or both!

I ended up baking my latkes slightly differently. But I would recommend the bake time and temperature that the recipe calls for. My latkes unfortunately ended up getting a little more well-done on one said than I would have preferred, but they were still great! Because I was also baking chicken, I kept the oven temperature at 350 degrees F. The latkes baked for 30 minutes, turned, then baked 20 minutes longer. 
Now it’s time to talk DESSERT! My favorite time! I brainstormed for a while, trying to think of traditional Hanukkah dessert recipes. All the desserts I had in mind seemed to be a bit time consuming though. So I decided to be creative and rather than make a traditional recipe, I showed my Hanukkah spirit! 

My mom gave me a recipe a while back for pumpkin cake. In the past we have always made this as pumpkin bread, which doesn’t need any frosting or icing – it is delicious by itself. But I decided I wanted to make pumpkin cake with a cream cheese frosting. Let’s give it a little bit of a richer flavor, shall we?! Okay, can we say YUMMY!! Soooo good… I’m drooling just thinking about it. My pumpkin cake has lots and lots of cinnamon in it. The original recipe calls for nutmeg, ginger and allspice too, but I omit it all and stick with just cinnamon. I stirred dark chocolate chips into the batter and poured it into two 9-inch round baking pans. Baked goods leave such a wonderful aroma too! The cakes were pulled out of the oven at a perfect time… nice and moist! After allowing the cakes to cool for some time on a cooling rack, I made two different cream cheese frostings. The first frosting I made was the basic cream cheese frosting, which was used as the filling between the two cake layers and to decorate the top of the cake (with the addition of food coloring). The second frosting I made was a chocolate cream cheese frosting, which I had never attempted before. Very sweet, but delicious! Of course I used a chocolate cream cheese frosting from my favorite website (http://www.allrecipes.com/) and modified it slightly based on the ingredients I had. 

Chocolate Cream Cheese Frosting 
 
Ingredients 
  • ¼ cup + 2 tablespoons cocoa
  • ¼ cup shortening
  • ½ cup + 2 tablespoons granulated sugar
  • 1 (8-oz) package cream cheese
  • ¼ cup confectioner’s sugar
  • ¼ cup heavy whipping cream
Directions

1. In a large bowl with a handheld mixer or using a kitchen aid mixer, mix together the cocoa, shortening, and granulated sugar until combined (this is also the equivalence of 1 cup of semisweet chocolate chips, but you have to get creative when you don’t have any on hand). 
2. Add the cream cheese and blend. 
3. Add the confectioner’s sugar and heavy whipping cream. Mix until well blended and a good frosting consistency.

Overall, we had a great dinner! I had fun cooking and baking as always. I just love my kitchen chemistry! Happy Hanukkah! Hanukkah Sameach (חנוכה שמח)!